Questions as text
Q1 · An artist has sketched some of the shapes to use in a cartoon image of a snail 9626/32 Oct/Nov 2017
3 An artist has sketched some of the shapes to use in a cartoon image of a snail. The pre-drawn shapes are shown in Fig. 1. Shape 1 Shape 2 Shape 3 Shape 4 Fig. 1 The final image is then composed and completed using image-editing tools on a computer. It is shown in Fig. 2. Snail Cartoon Fig. 2 Explain, in detail, how you would use image-editing tools to create the final image from the components. … … … … … … … … … … … … … … … … … … … … [8]
8 marks
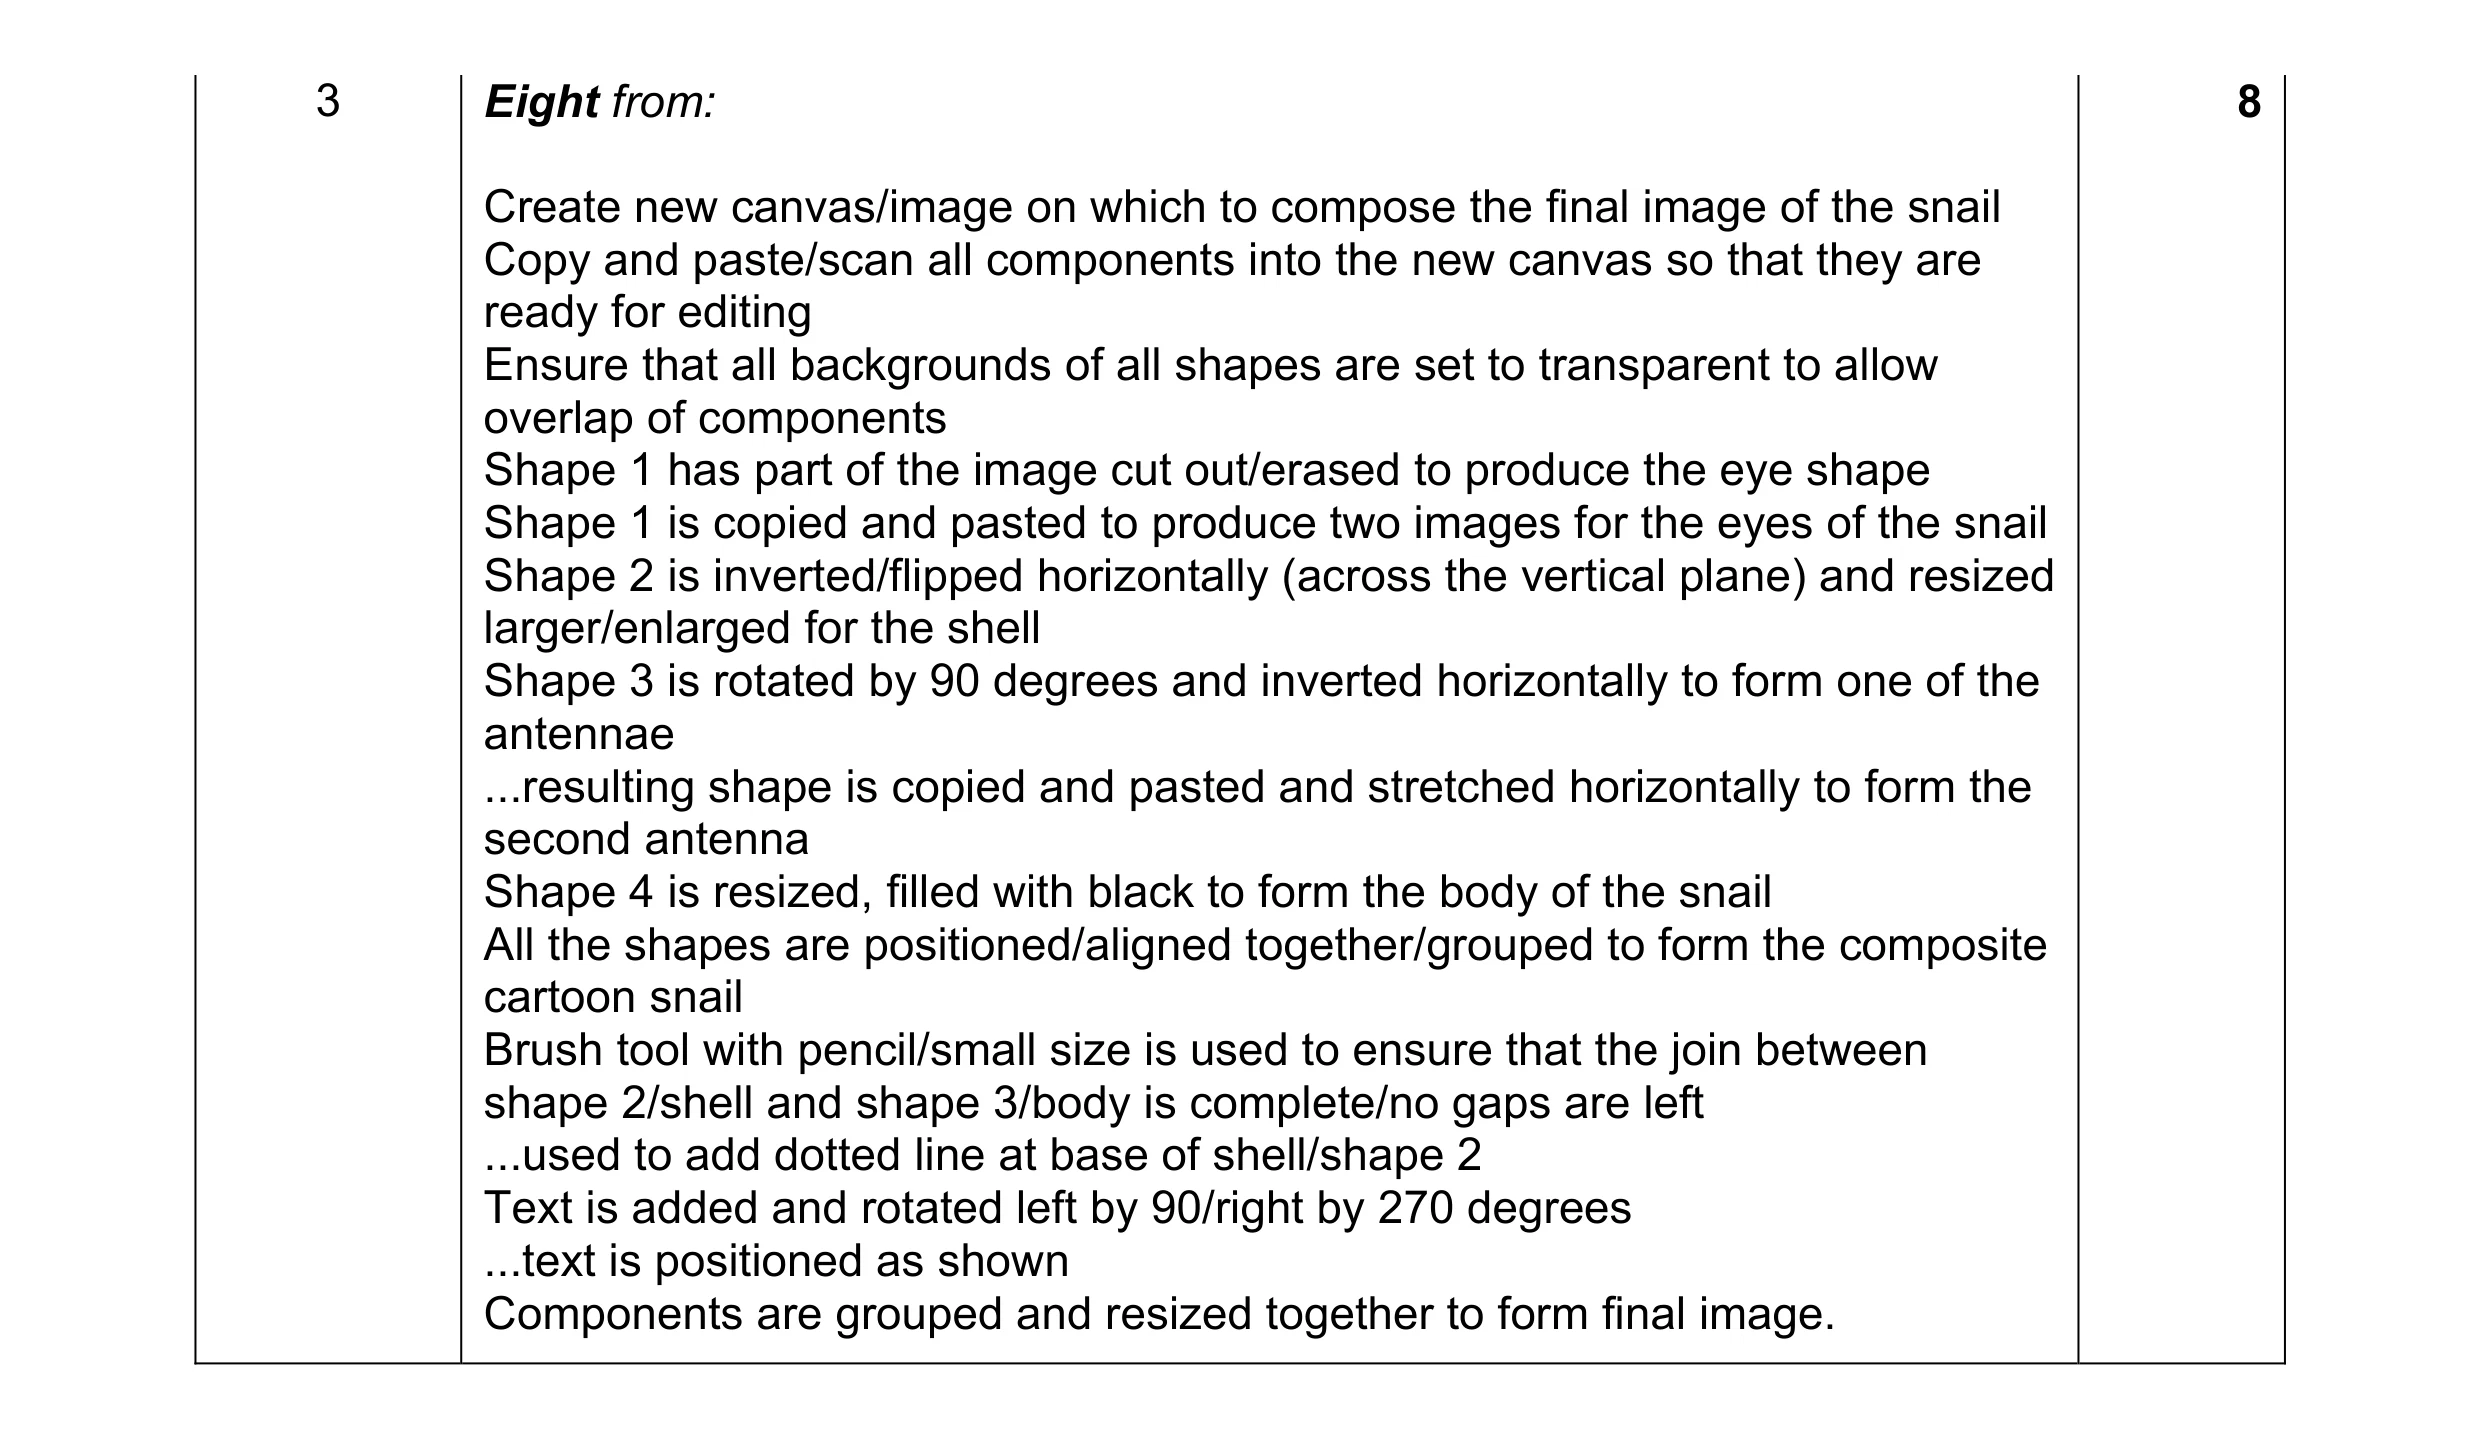
Mark scheme: 3 Eight from: 8 Create new canvas/image on which to compose the final image of the snail Copy and paste/scan all components into the new canvas so that they are ready for editing Ensure that all backgrounds of all shapes are set to transparent to allow overlap of components Shape 1 has part of the image cut out/erased to produce the eye shape Shape 1 is copied and pasted to produce two images for the eyes of the snail Shape 2 is inverted/flipped horizontally (across the vertical plane) and resized larger/enlarged for the shell Shape 3 is rotated by 90 degrees and inverted horizontally to form one of the antennae ...resulting shape is copied and pasted and stretched horizontally to form the second antenna Shape 4 is resized, filled with black to form the body of the snail All the shapes are positioned/aligned together/grouped to form the composite cartoon snail Brush tool with pencil/small size is used to ensure that the join between shape 2/shell and shape 3/body is complete/no gaps are left ...used to add dotted line at base of shell/shape 2 Text is added and rotated left by 90/right by 270 degrees ...text is positioned as shown Components are grouped and resized together to form final image.
This question in 9626/32 Oct/Nov 2017
Q2 · Computers can be used to edit images for advertising features in a printed magazine 9626/33 Oct/Nov 2017
10 Computers can be used to edit images for advertising features in a printed magazine. Describe the use of image editing techniques to alter images for use in advertising products. … … … … … … … … … … … … … … … [6]
6 marks
Mark scheme: 10 Six from e.g.: 6 Cropping of images to remove unwanted areas... ...use of rule of thirds to keep image visual balance ...can lose important detail if poorly used Colour balance adjustment to change ‘feel’ of image... ...whiter to create warm mood ...bluer to create cooler mood/feel ...restore natural colour to flesh tones Brightness/contrast changes to change appearance of image ...increase in contrast for photos taken on dull days can show more detail ...decrease in contrast for photos taken in bright sun can increase detail in shadows Add a new/missing object/replacing an object in the image ...combining elements of different photos to create a new photo... ...covering/obscuring part of the image with another object Creating a digital illustration/cartoon of the original photo Changing/adding a different/new/fantasy/magical background Create an illusion of depth Create special effects Adjusting the image itself ...change the transparency of an image ...resizing of photos ...reducing noise in the image ..correcting lens distortion/perspective.
This question in 9626/33 Oct/Nov 2017
Q3 · The photograph shown in Fig 9626/33 Oct/Nov 2018
1 The photograph shown in Fig. 1 was taken and manipulated into the JPEG image shown in Fig. 2. Fig. 1 Fig. 2 (a) Describe all the software features used to change the image in Fig. 1 to produce the image in Fig. 2. … … … … … … [2] (b) Explain why the features of the face in Fig. 2 are no longer easy to see. … … … … … … … … … … … … … … [6]
8 marks
Mark scheme: Question Answer Marks 1(a) Two from: 2 Crop tool to remove excess background/to show just the face Border line added to the whole image Resize tool to make image larger Saved as compressed (JPEG) format. 1(b) Six from: 6 The image in Fig. 1 has been created/saved as a bitmap Bitmaps are made of pixels The image in Fig. 2 has been saved as a compressed image with too much compression Loss of pixel/data during compression so detail is lost in the image of the face The compression artefacts are visible to the human eye The pixels in Fig. 2 are no longer small enough to be indistinguishable by the human eye When enlarged the pixels of the face/image become visible The face now looks unrealistic/blocky so the features are not distinguishable.
This question in 9626/33 Oct/Nov 2018
Q4 · Layers can be used when editing digital images 9626/32 Feb/March 2019
4 Layers can be used when editing digital images. (a) Describe what is meant by a ‘layer’ in computer graphics. … … … [1] (b) Describe how layers could be used to enhance a digital image. … … … … … … … … … … [4] (c) Discuss the impact on society of the use of image editing on photographs in fashion magazines. … … … … … … … … … … … … … … … … … … … … [8]
13 marks
Mark scheme: 4(a) One from: 1 Level at which an object/file is placed in an image Represents part of a graphic/image as pixels (in a bitmap). 4(b) Four from: 4 Can have transparency to allow other layers to show through/be seen Can be overlapped to create a composite image Can be replicated to show multiple instances of same image/object Can be replicated to hide/mask parts of an image Can be used to adjust the brightness/saturation of other layers. 4(c) Command word: Discuss: give important arguments for and against. Often 8 requires a conclusion. Eight from e.g.: Editing can enhance attractiveness/look/appearance of items/models Editing can attract attention of viewer to compensate for reduction in attention span in recent years Editing can make poor photos appear neat/presentable to clients/customers to increase sales Less expensive than taking exact/precise/perfect photographs Removing blemishes, wrinkles, flabby parts/altering body shape is flattering to the model/clothes A false/unrealistic body image can be created Viewing of only perfection in clothes/models can lower viewers self-esteem ...cause eating disorders ...cause unnecessary pressure to confirm to unrealistic ideals Editing can be time consuming /tedious and slow down production.
This question in 9626/32 Feb/March 2019
Q5 · The photograph in Fig 9626/32 May/June 2019
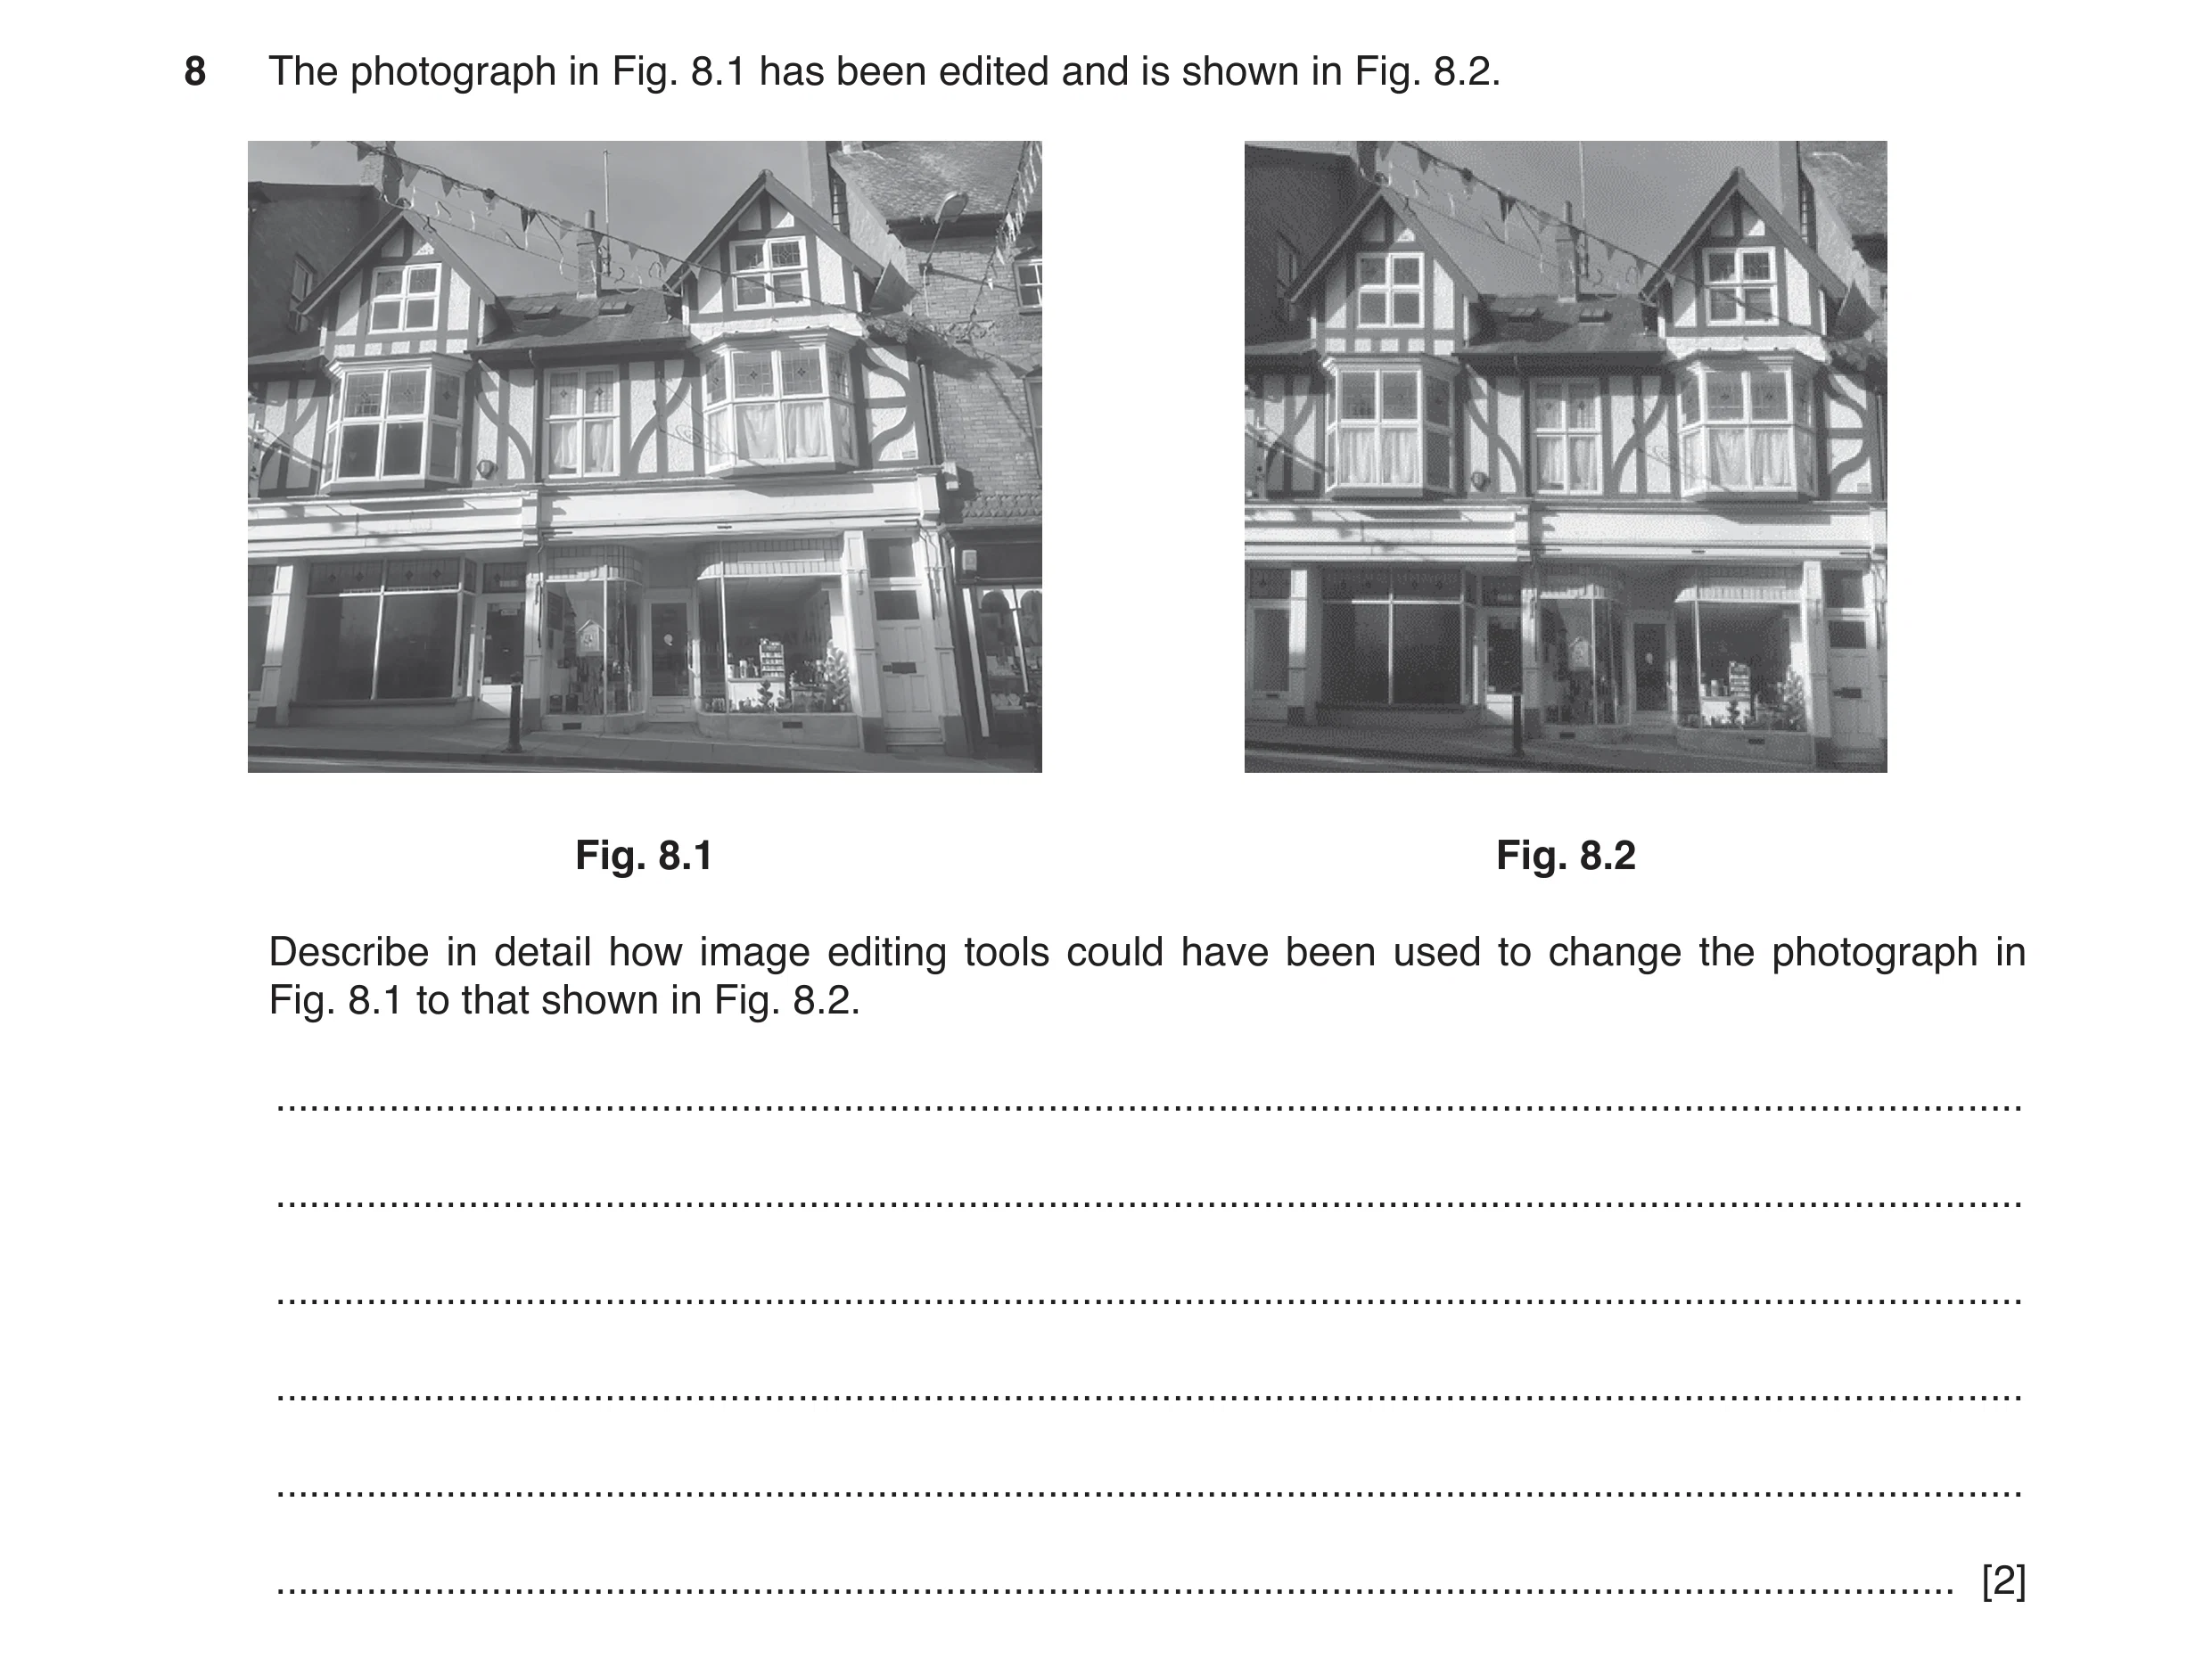
8 The photograph in Fig. 8.1 has been edited and is shown in Fig. 8.2. Fig. 8.1 Fig. 8.2 Describe in detail how image editing tools could have been used to change the photograph in Fig. 8.1 to that shown in Fig. 8.2. … … … … … … [2]
2 marks
Mark scheme: 8 Two from: 2 Perspective / transformation tool has been used (to correct perspective) by ‘stretching’ the image across the top to align the sides of the stores / shops / buildings Rotate right tool used to correct the image to an upright store / shop / building front Curtains (in left windows) have been inserted by copy / paste / clone pixel tools using those in right-hand set of windows as source Image has been cropped to remove some of the building Image has been resized to improve aspect ratio.
This question in 9626/32 May/June 2019
Q6 · Colour gradients can be used when filling shapes in digital images 9626/32 May/June 2019
9 Colour gradients can be used when filling shapes in digital images. (a) Describe two properties of the filled shape that can be changed with the use of colour gradients. … … … … … … [2] (b) Describe the types of gradient that can be used when filling a shape with colour. … … … … … … … … … … [4]
6 marks
Mark scheme: 9(a) Two from: 2 Opacity from completely opaque to totally transparent Fade (actual) colour from one colour into another colour / white across the colour palette. 9(b) Four from e.g. 4 Linear fills evenly across the image Radial fills with single line paths where the fill starts at centre and fills outwards along all radii «fills evenly along all radii Elliptical fills with two line paths where fill starts at centre and fills outwards along two directions away from the centre «can be skewed along one line or the other Conical fills create the illusion that the image is a cone shape Square fills can produce a star-like view in the colour Three colour fills merge from one colour into two others across the image Four colour fills merge from one colour into three others across the image.
This question in 9626/32 May/June 2019
Q7 · A photograph of a scene 9626/32 Oct/Nov 2019
11 Fig. 11.1 shows a photograph of a scene. Fig. 11.2 shows the same scene after the photograph has been edited with image editing software. Fig. 11.1 Fig. 11.2 Describe how image editing tools could have been used to change the photograph in Fig. 11.1 into that in Fig. 11.2. … … … … … … … … … … … … … … … … … … … … [8]
8 marks
Mark scheme: 11 Eight from: 8 Removal of ‘Private barrier’/structure: Freehand selection tool(s) to select irregular objects/barrier structure elements Cut tool to remove object from the image Colour picker tool to select background colour next to/behind barrier Paint(brush) tool to fill in area where barrier removed/paint over barrier structure ... using selected colour to match backgrounds/blend with backgrounds where barrier was Use a tool which allows cloning to fill pixels that were removed/use of clone tool/select and copy and paste to disguise where shadow of barrier was on path Addition of new lamp post: Freehand select tool to draw around existing lamp post/select lamp post Copy/paste tools to copy lamp post to clipboard (leaving existing in place) Create new layer for additional lamp post/paste new lamp post into layer/image Position new lamp post to precise position required Clean up pasted image: Colour picker tool to select colour to be painted into edges of added image and paint tool used to fill pixels around image to make it ‘blend’ in Use of appropriate brush size Adding text for title: Create new layers for text and path Type text and create/draw path for the text Use text to path to create shaped text Position text/title Remove temporary layers used to construct title Finalising image: Merge layers (down) to ‘flatten’ image.
This question in 9626/32 Oct/Nov 2019
Q8 · Images of the faces of people can be manipulated and changed by morphing 9626/31 Oct/Nov 2021
11 Images of the faces of people can be manipulated and changed by morphing. Describe how morphing could be used to change an image of a sad face into a smiling face. … … … … … … … … … … [4]
4 marks
Mark scheme: 11 Four from: 4 Uses forward mapping of pixels from one image into next Pixels from start image/sad face mapped to new position in final image/smiling face Setting of control points in start image to map exactly to points in final image Pixels in start image mapped to points in final image that are determined by ‘weighting’/Gaussian function in software Pixels next to control point move more than those further away/less than control points Pixels further away from control point are less affected by software algorithm so move less.
This question in 9626/31 Oct/Nov 2021
Q9 · Images of the faces of people can be manipulated and changed by morphing 9626/33 Oct/Nov 2021
11 Images of the faces of people can be manipulated and changed by morphing. Describe how morphing could be used to change an image of a sad face into a smiling face. … … … … … … … … … … [4]
4 marks
Mark scheme: 11 Four from: 4 Uses forward mapping of pixels from one image into next Pixels from start image/sad face mapped to new position in final image/smiling face Setting of control points in start image to map exactly to points in final image Pixels in start image mapped to points in final image that are determined by ‘weighting’/Gaussian function in software Pixels next to control point move more than those further away/less than control points Pixels further away from control point are less affected by software algorithm so move less.
This question in 9626/33 Oct/Nov 2021
Q10 · RGB and CMYK are two systems that are used to produce colour in graphic design 9626/32 Feb/March 2022
9 RGB and CMYK are two systems that are used to produce colour in graphic design. Compare, by describing similarities and differences, the use of the RGB and CMYK colour systems in graphic design. … … … … … … … … … … … … … … … … … [6]
6 marks
Mark scheme: 9 Command word: Compare: identify/comment on similarities and/or 6 differences. Six from: RGB is Red, Green, Blue and CMYK is Cyan, Magenta, Yellow, Key/Black Similarities: Both are colour codes for defining colours Both can produce a range of colours from white through to black Both are supported by most graphic editing packages Both are affected by differences in the display media/require monitor and paper adjustments to produce the best quality output Differences: RGB uses additive colours to create the range of colours whereas CMYK uses subtractive colours Adding all three colours in RGB produces white Adding all colours in CMYK produces black Black has to be added in CMYK because CMY produces a ‘muddy’ brown/black/not true black ...a black cartridge is required in most inkjet printers to produce pure black on paper RGB is used for computer/screen/TV display screen whereas CMYK is used for printing Must be at least one similarity and one difference for full marks.
This question in 9626/32 Feb/March 2022
Q11 · Image editing software has tools for altering digital images 9626/32 Oct/Nov 2022
10 Image editing software has tools for altering digital images. Explain why a graphic designer might use each of the following tools to alter a digital image. (a) layer tool … … … … … … … … … [3] (b) flatten tool … … … … … … [2]
5 marks
Mark scheme: 10(a) Three from: 3 To separate elements of image so that each can be developed/worked on independently of the others To overlay elements onto others so that each element can be positioned/moved independently of the others To allow editing of elements while leaving other elements untouched To allow the reversal/undo of actions on one part of graphic so that errors can be corrected/actions can be carried out to see effect without spoiling other elements To allow different amounts of opacity/transparency (of objects) To insert text so that writing can be placed anywhere on the image. 10(b) Two from: 2 To combine/merge all layers into one layer To discard any hidden layers so that all layers are visible To fill any transparent areas with white /background colour so they appear as in the background To allow image/creation of pdf so that it is ready for printing To reduce the file size.
This question in 9626/32 Oct/Nov 2022
Q12 · Colour management systems (CMS) are used in computer graphics 9626/33 Oct/Nov 2024
4 Colour management systems (CMS) are used in computer graphics. Explain why a CMS is needed. … … … … … … … … … … … … … … [6]
6 marks
Mark scheme: 4 Six from: 6 • CMS used to ensure that different application / devices / operating systems display colours consistently / predictably • Colour is dependent on the device / monitor displaying the colour(s) • Scanner can produce image with RGB / colour values different from those used by a monitor • Different devices require different colour values sent to them to display the same colours • Colour values need to be transformed / adjusted / calibrated by algorithms / tables / software • Using colour profiles / mathematical representation of the ‘colour space’ of a device (1) not all transformations work for every device in same way (1) • CMS provide choice / selection of tools / algorithms / software to make the transformations • CMS allows re-use of graphics for different media / online and paper (with consistent / predictable colours) • CMS provides automatic / removes need for manual adjustment of colours when using different media / online and paper.
This question in 9626/33 Oct/Nov 2024

 2 / 11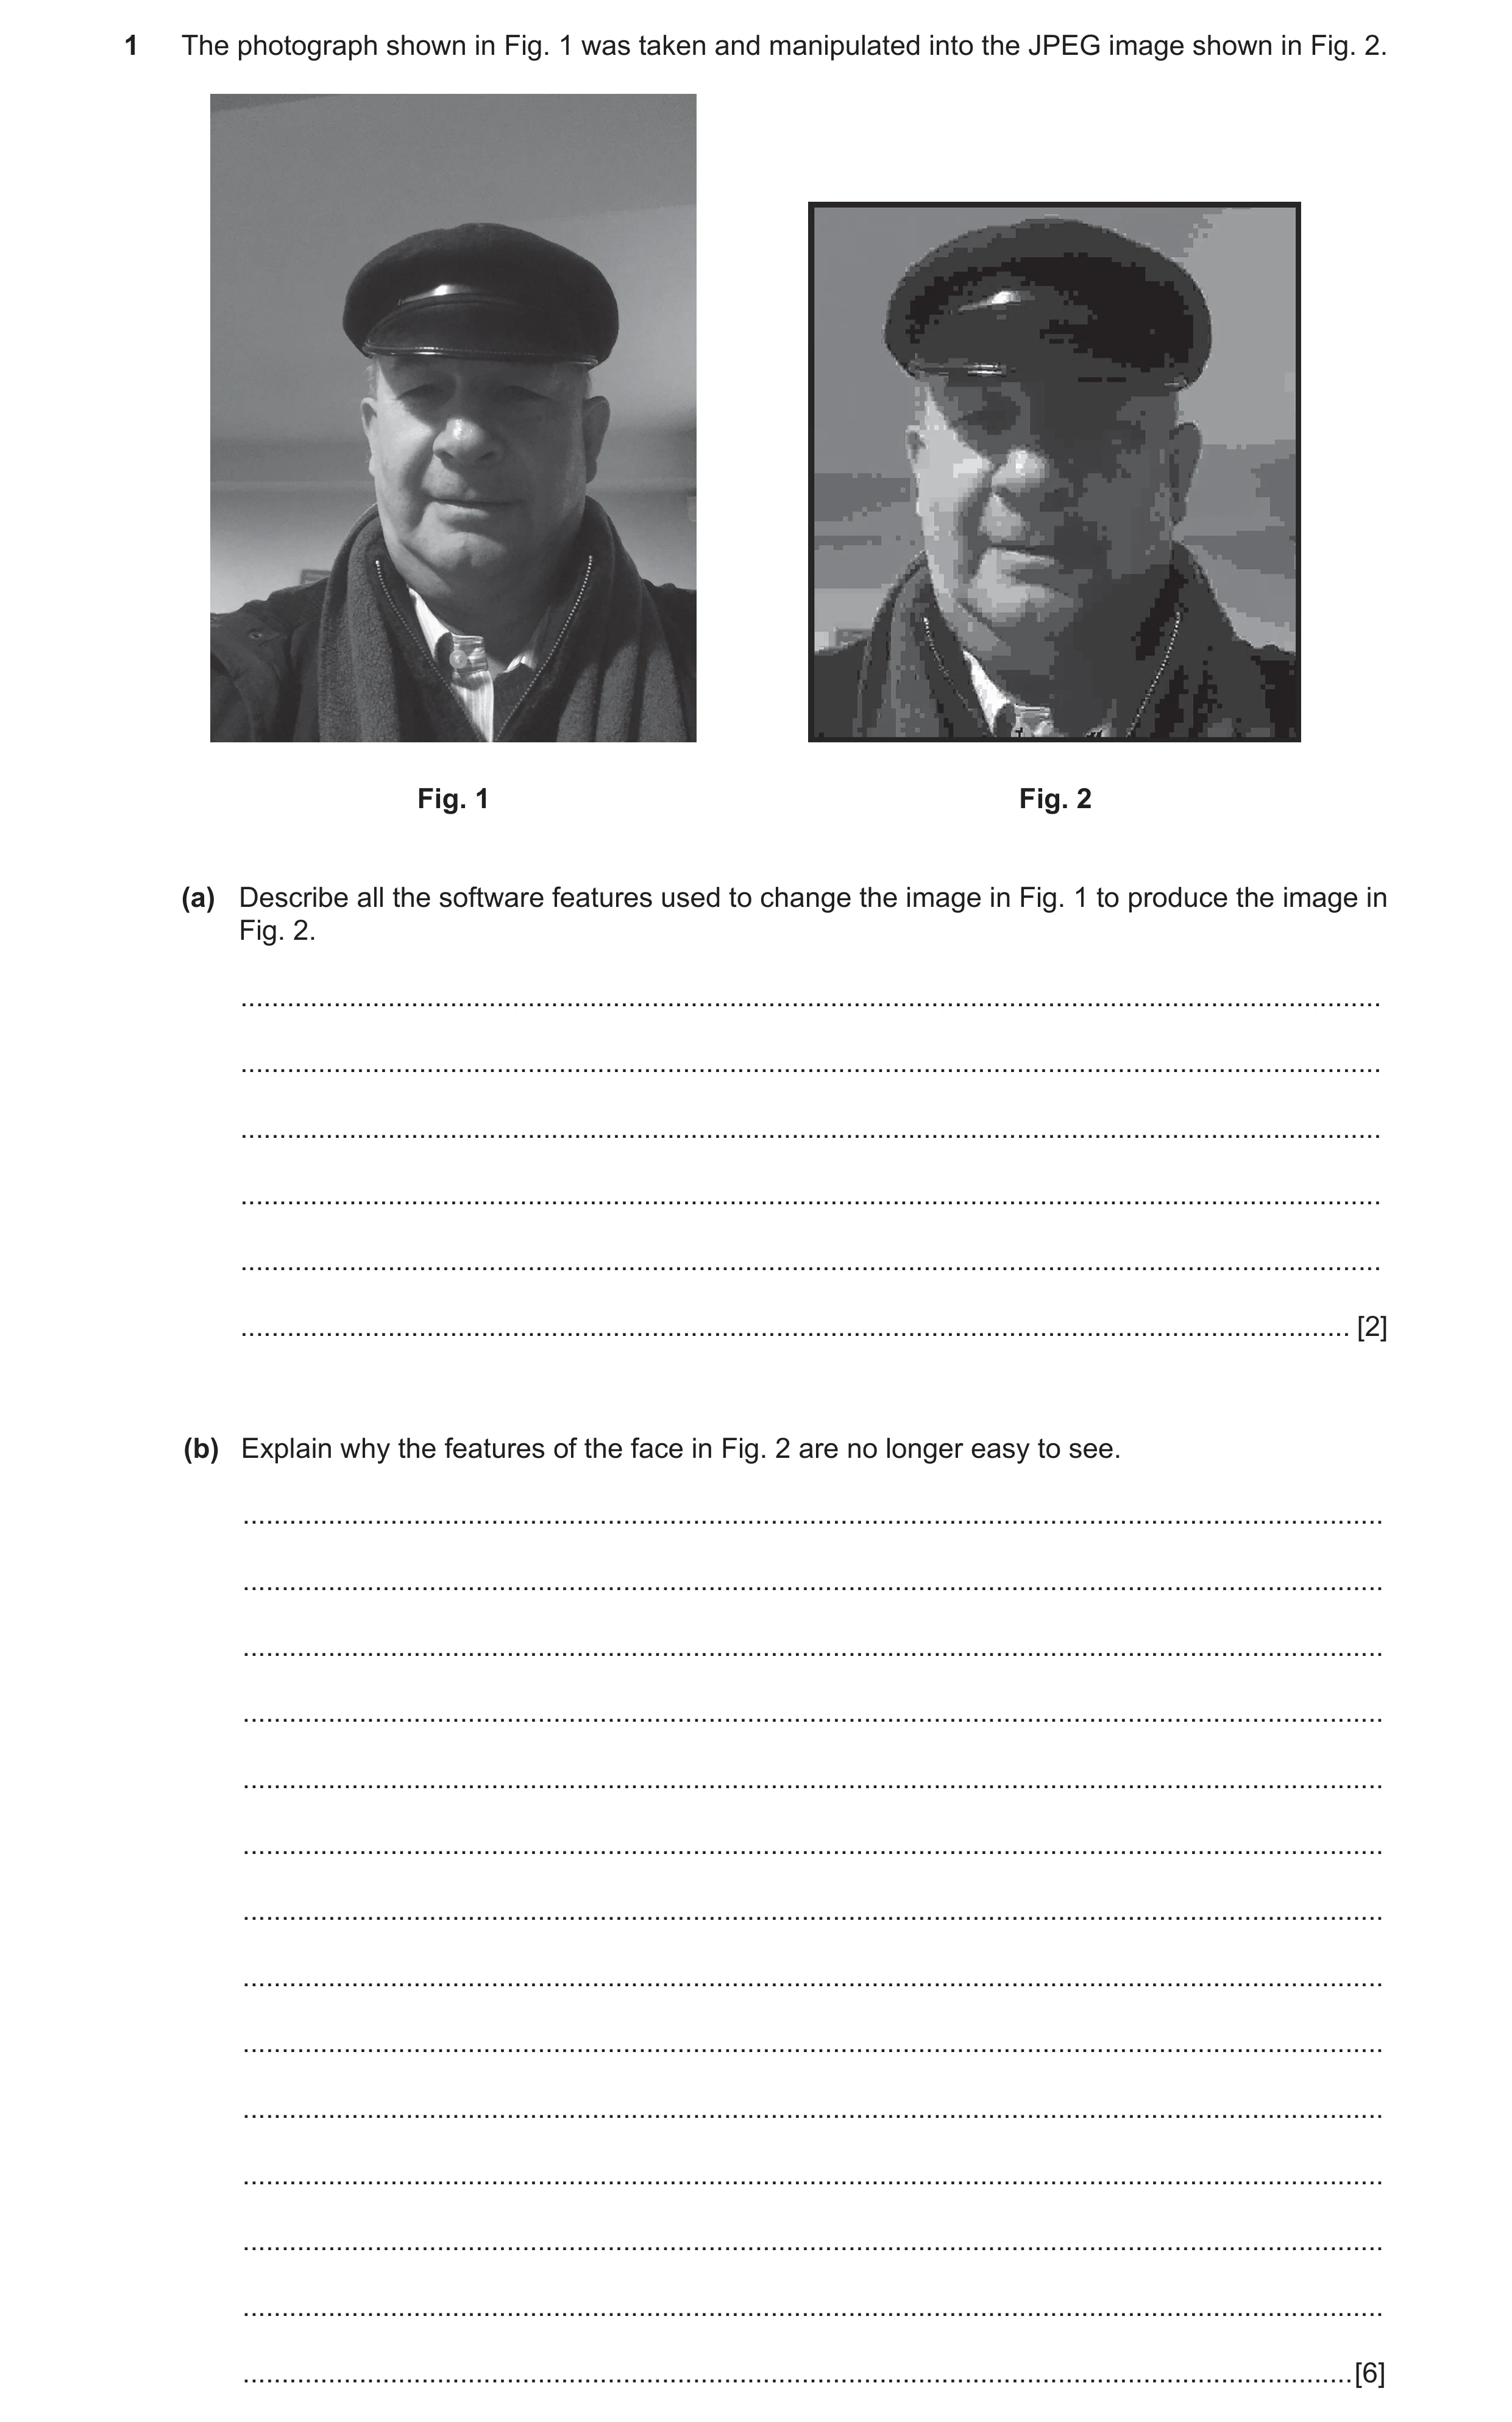
 5 / 11
 6 / 11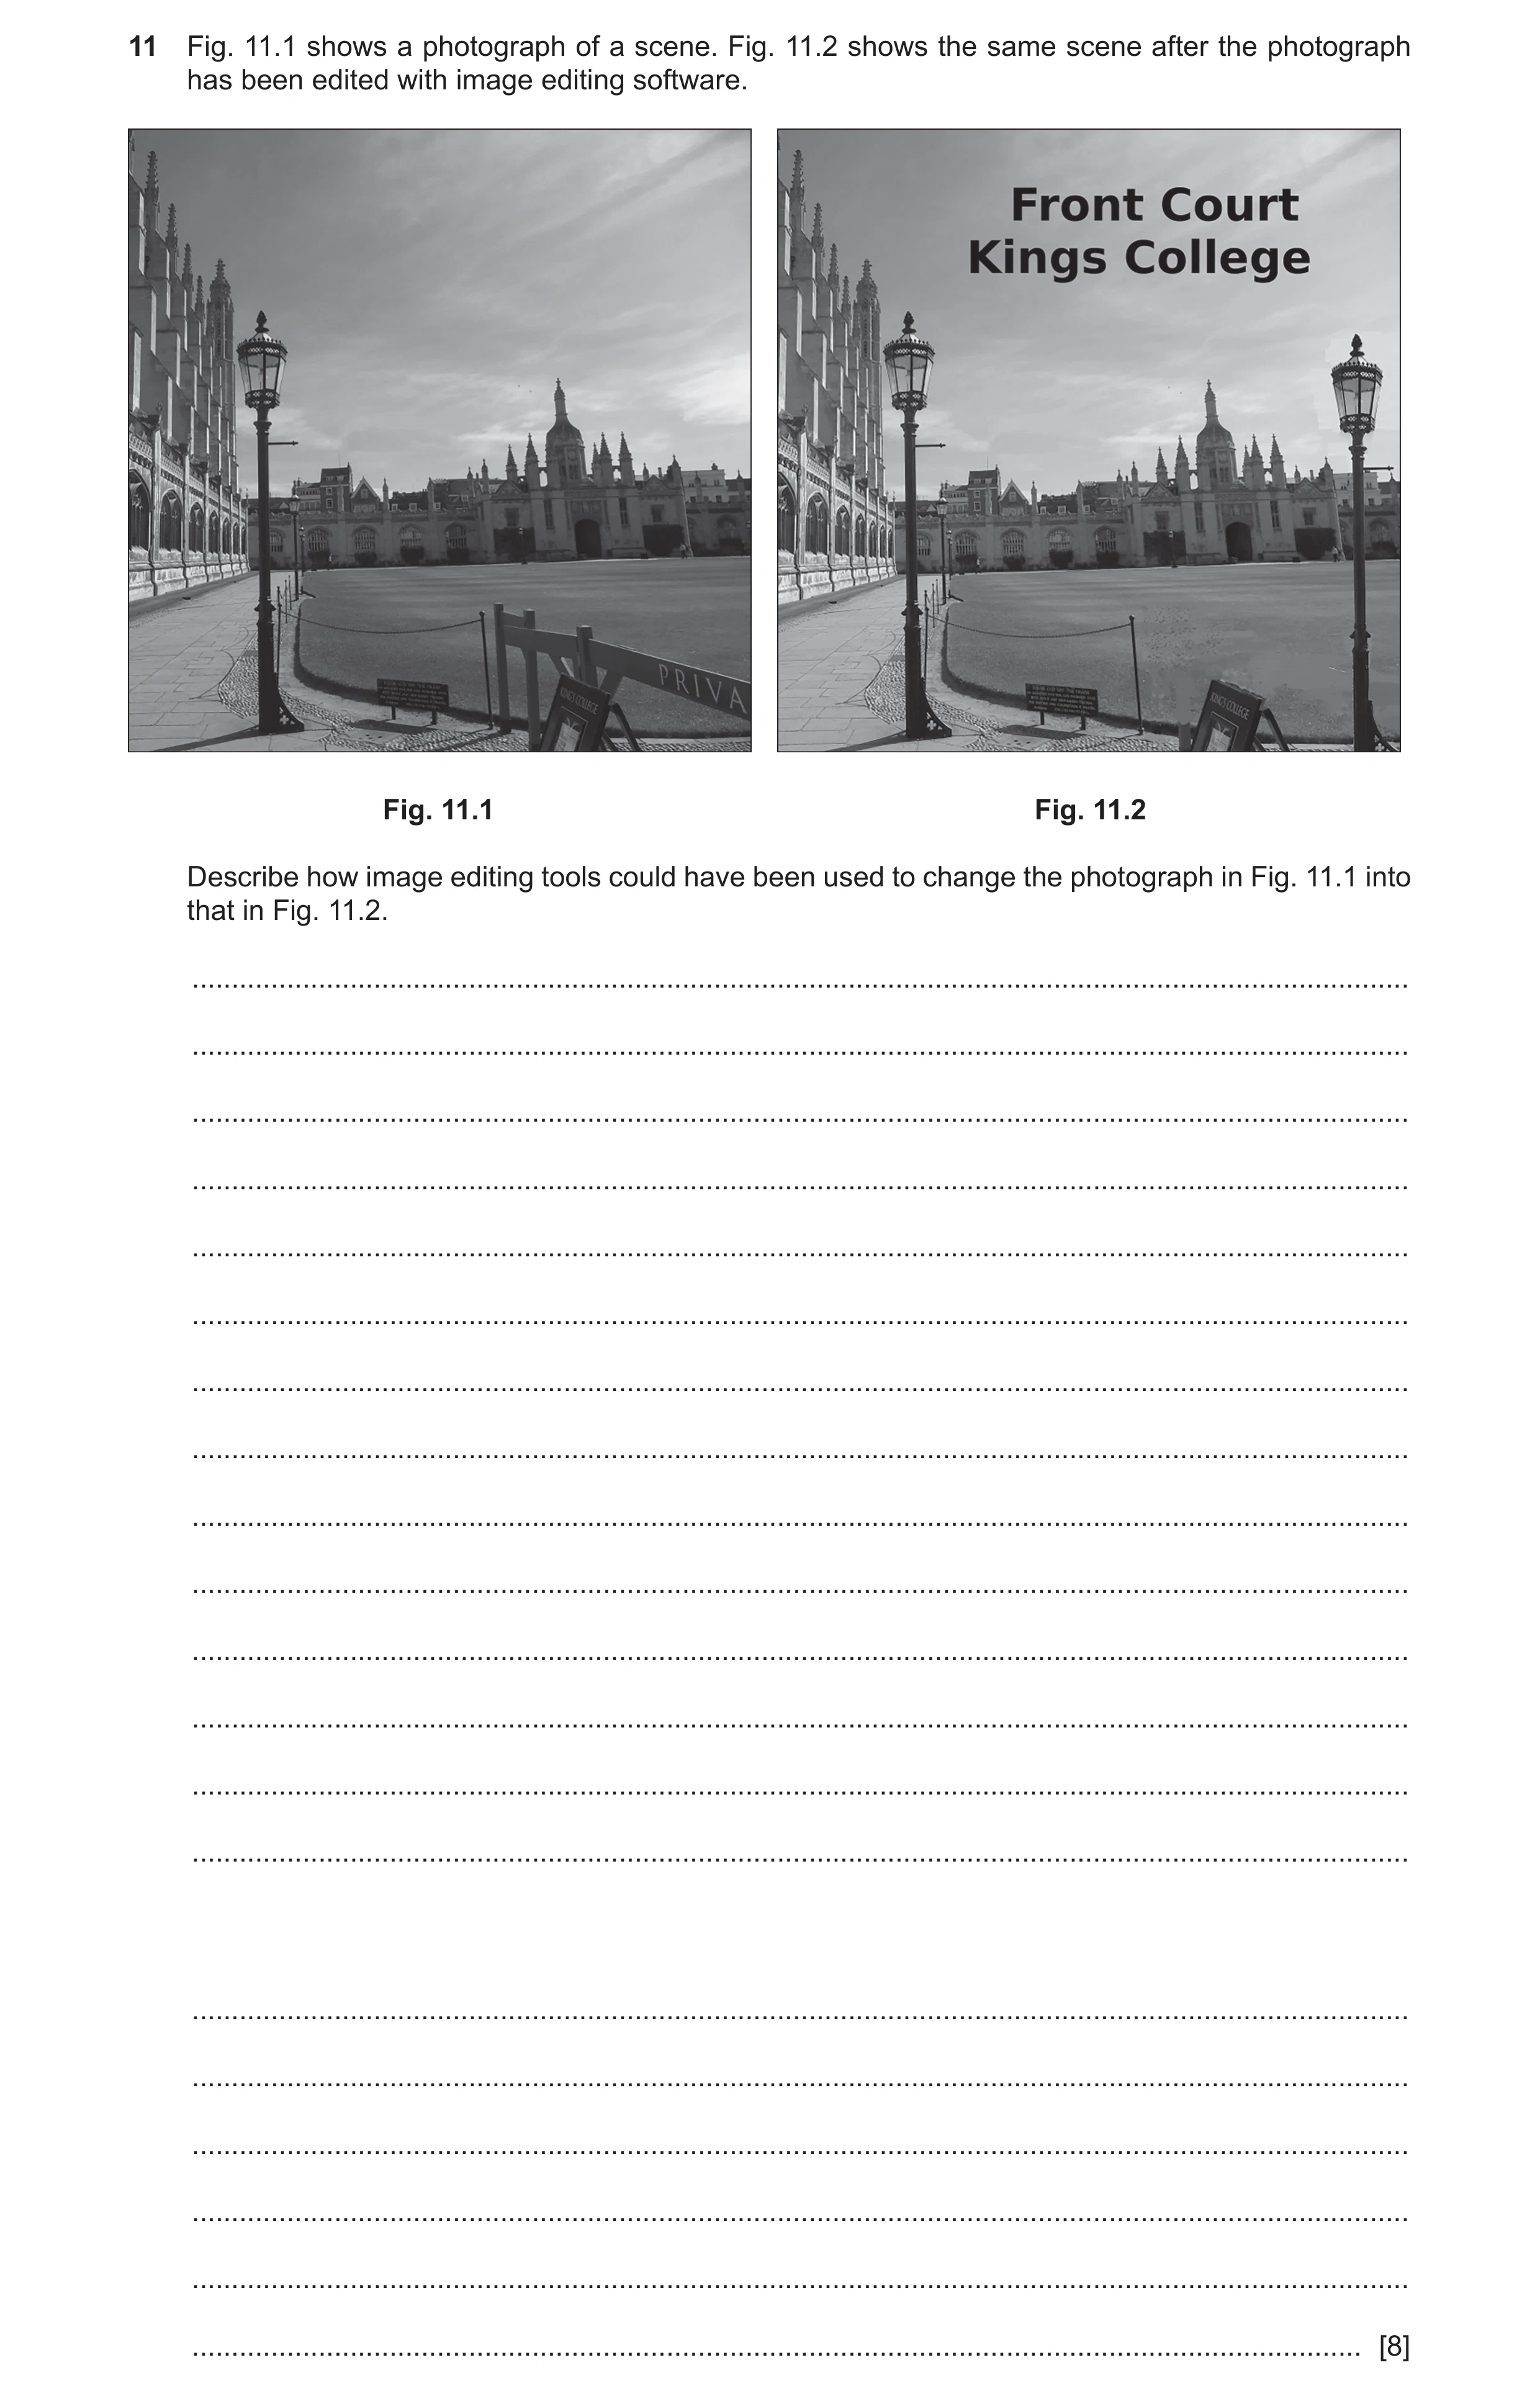
 8 / 11
 9 / 11
 10 / 11
 11 / 11
 8
8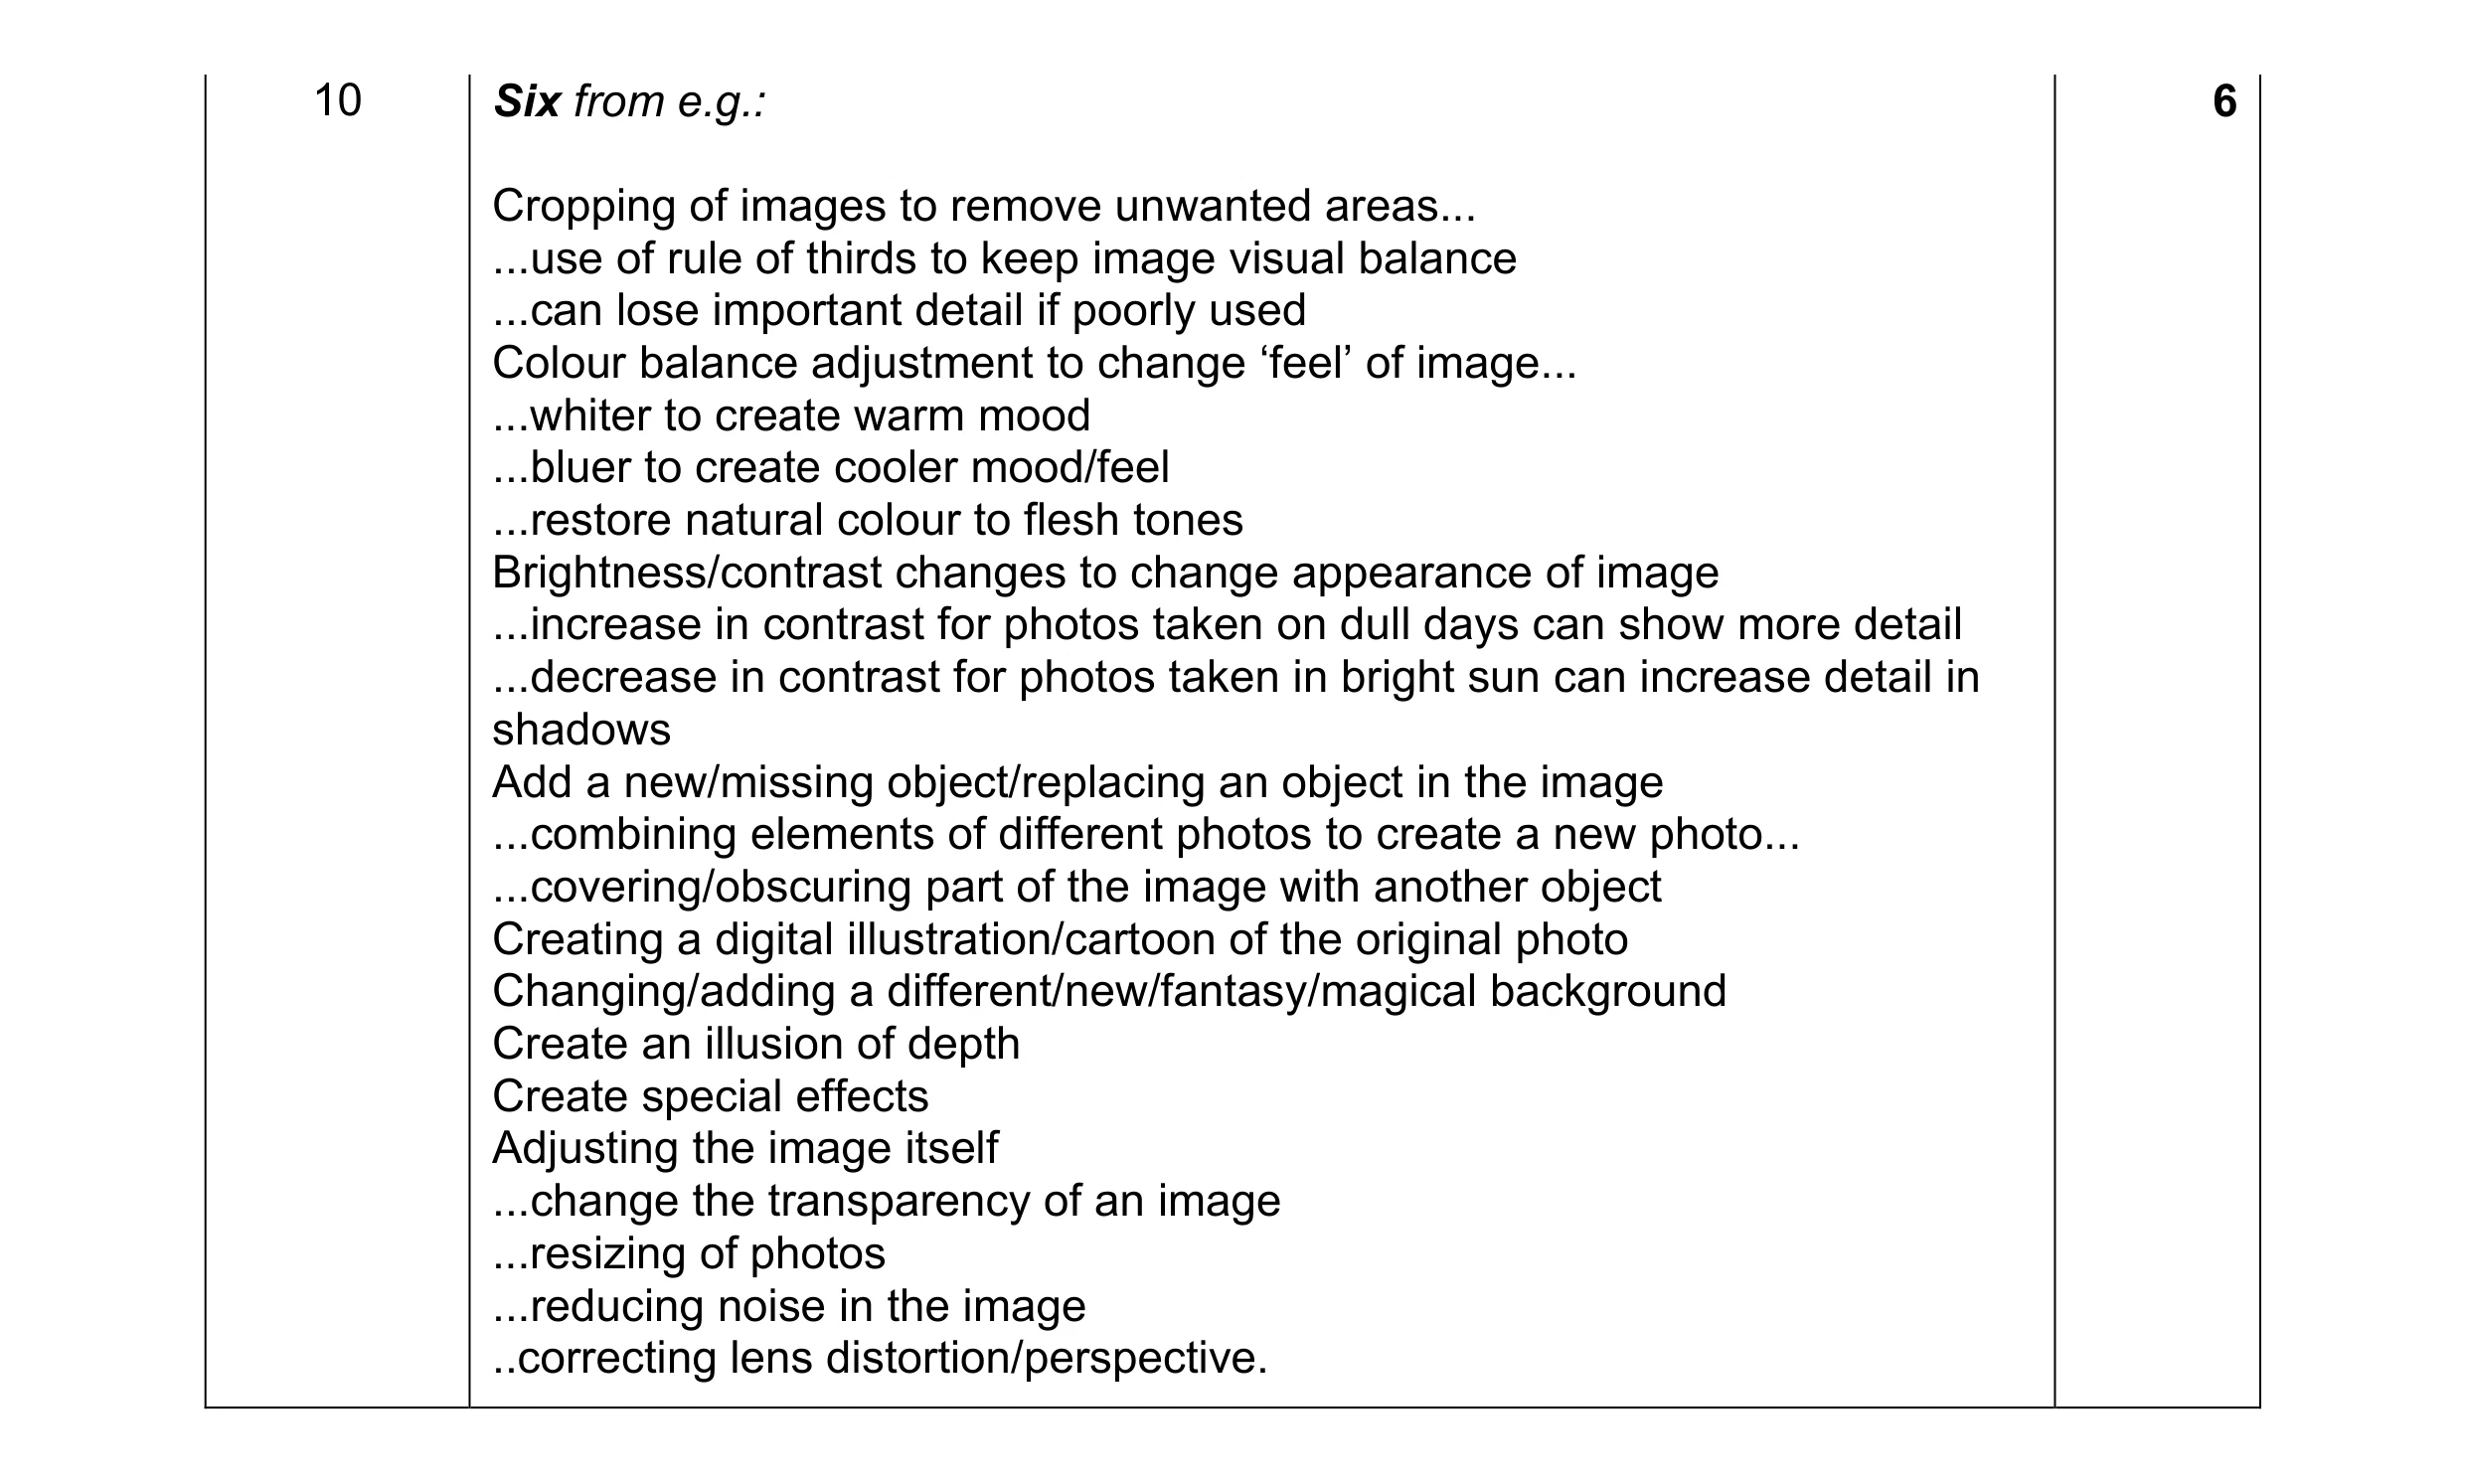 6
6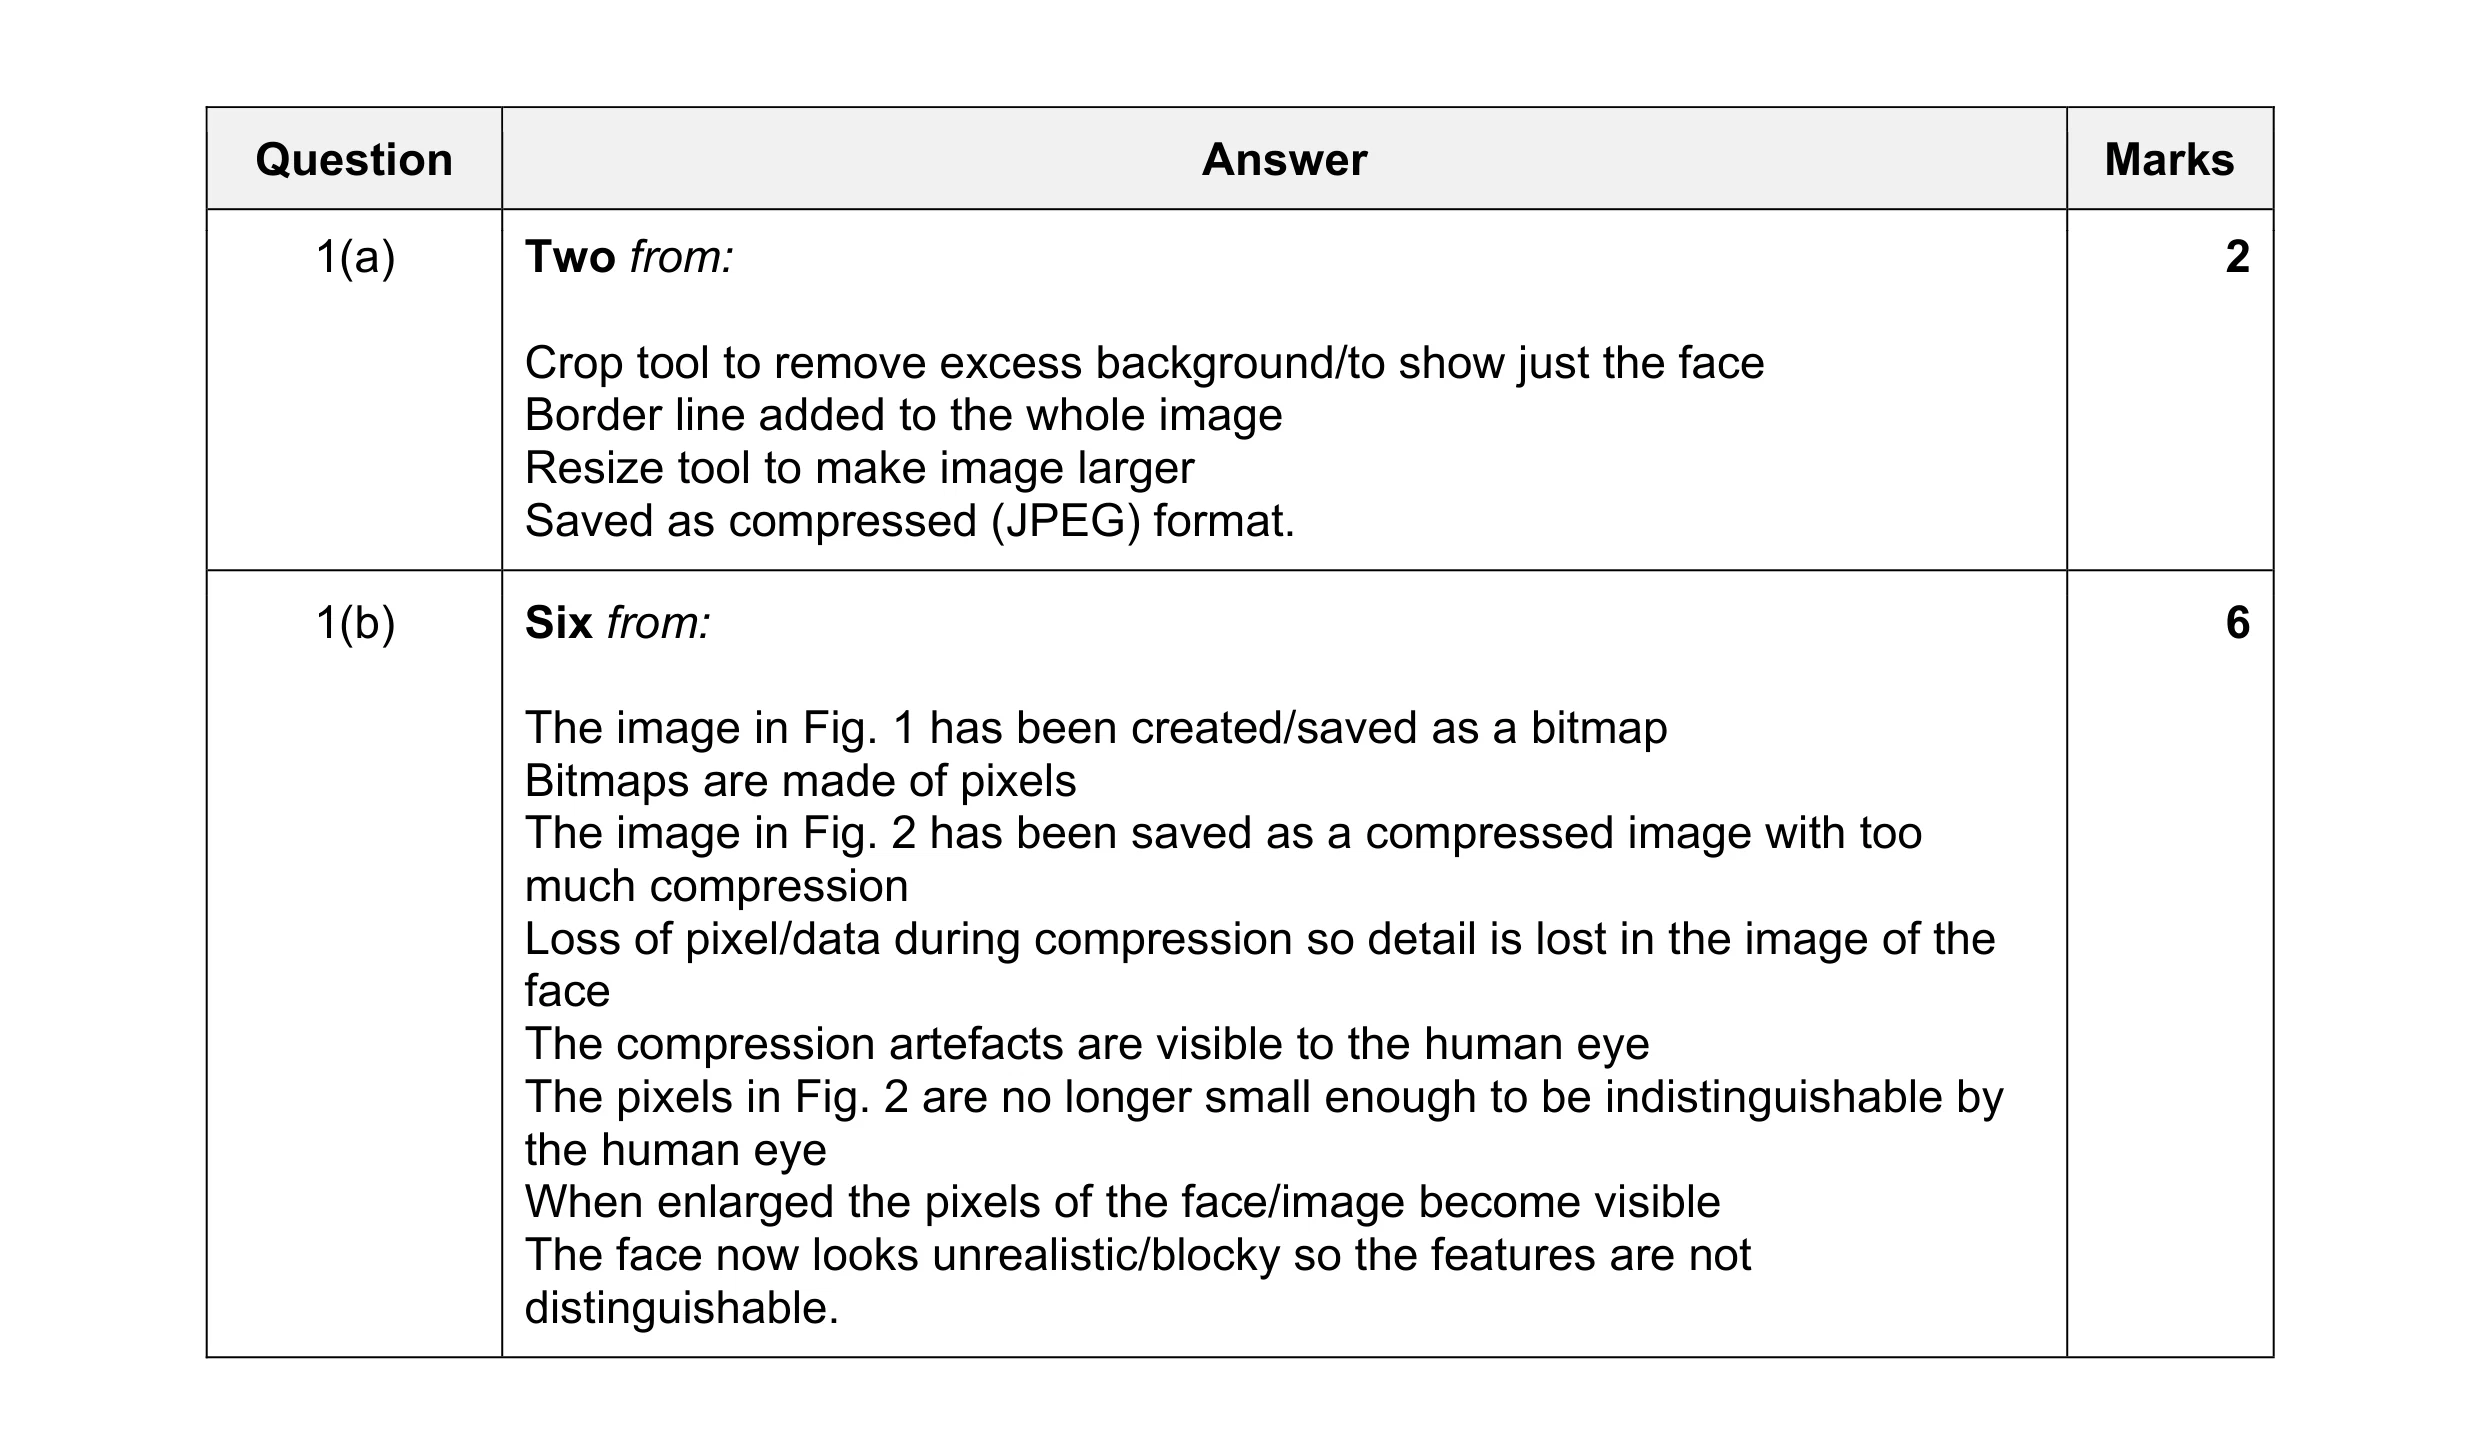 8
8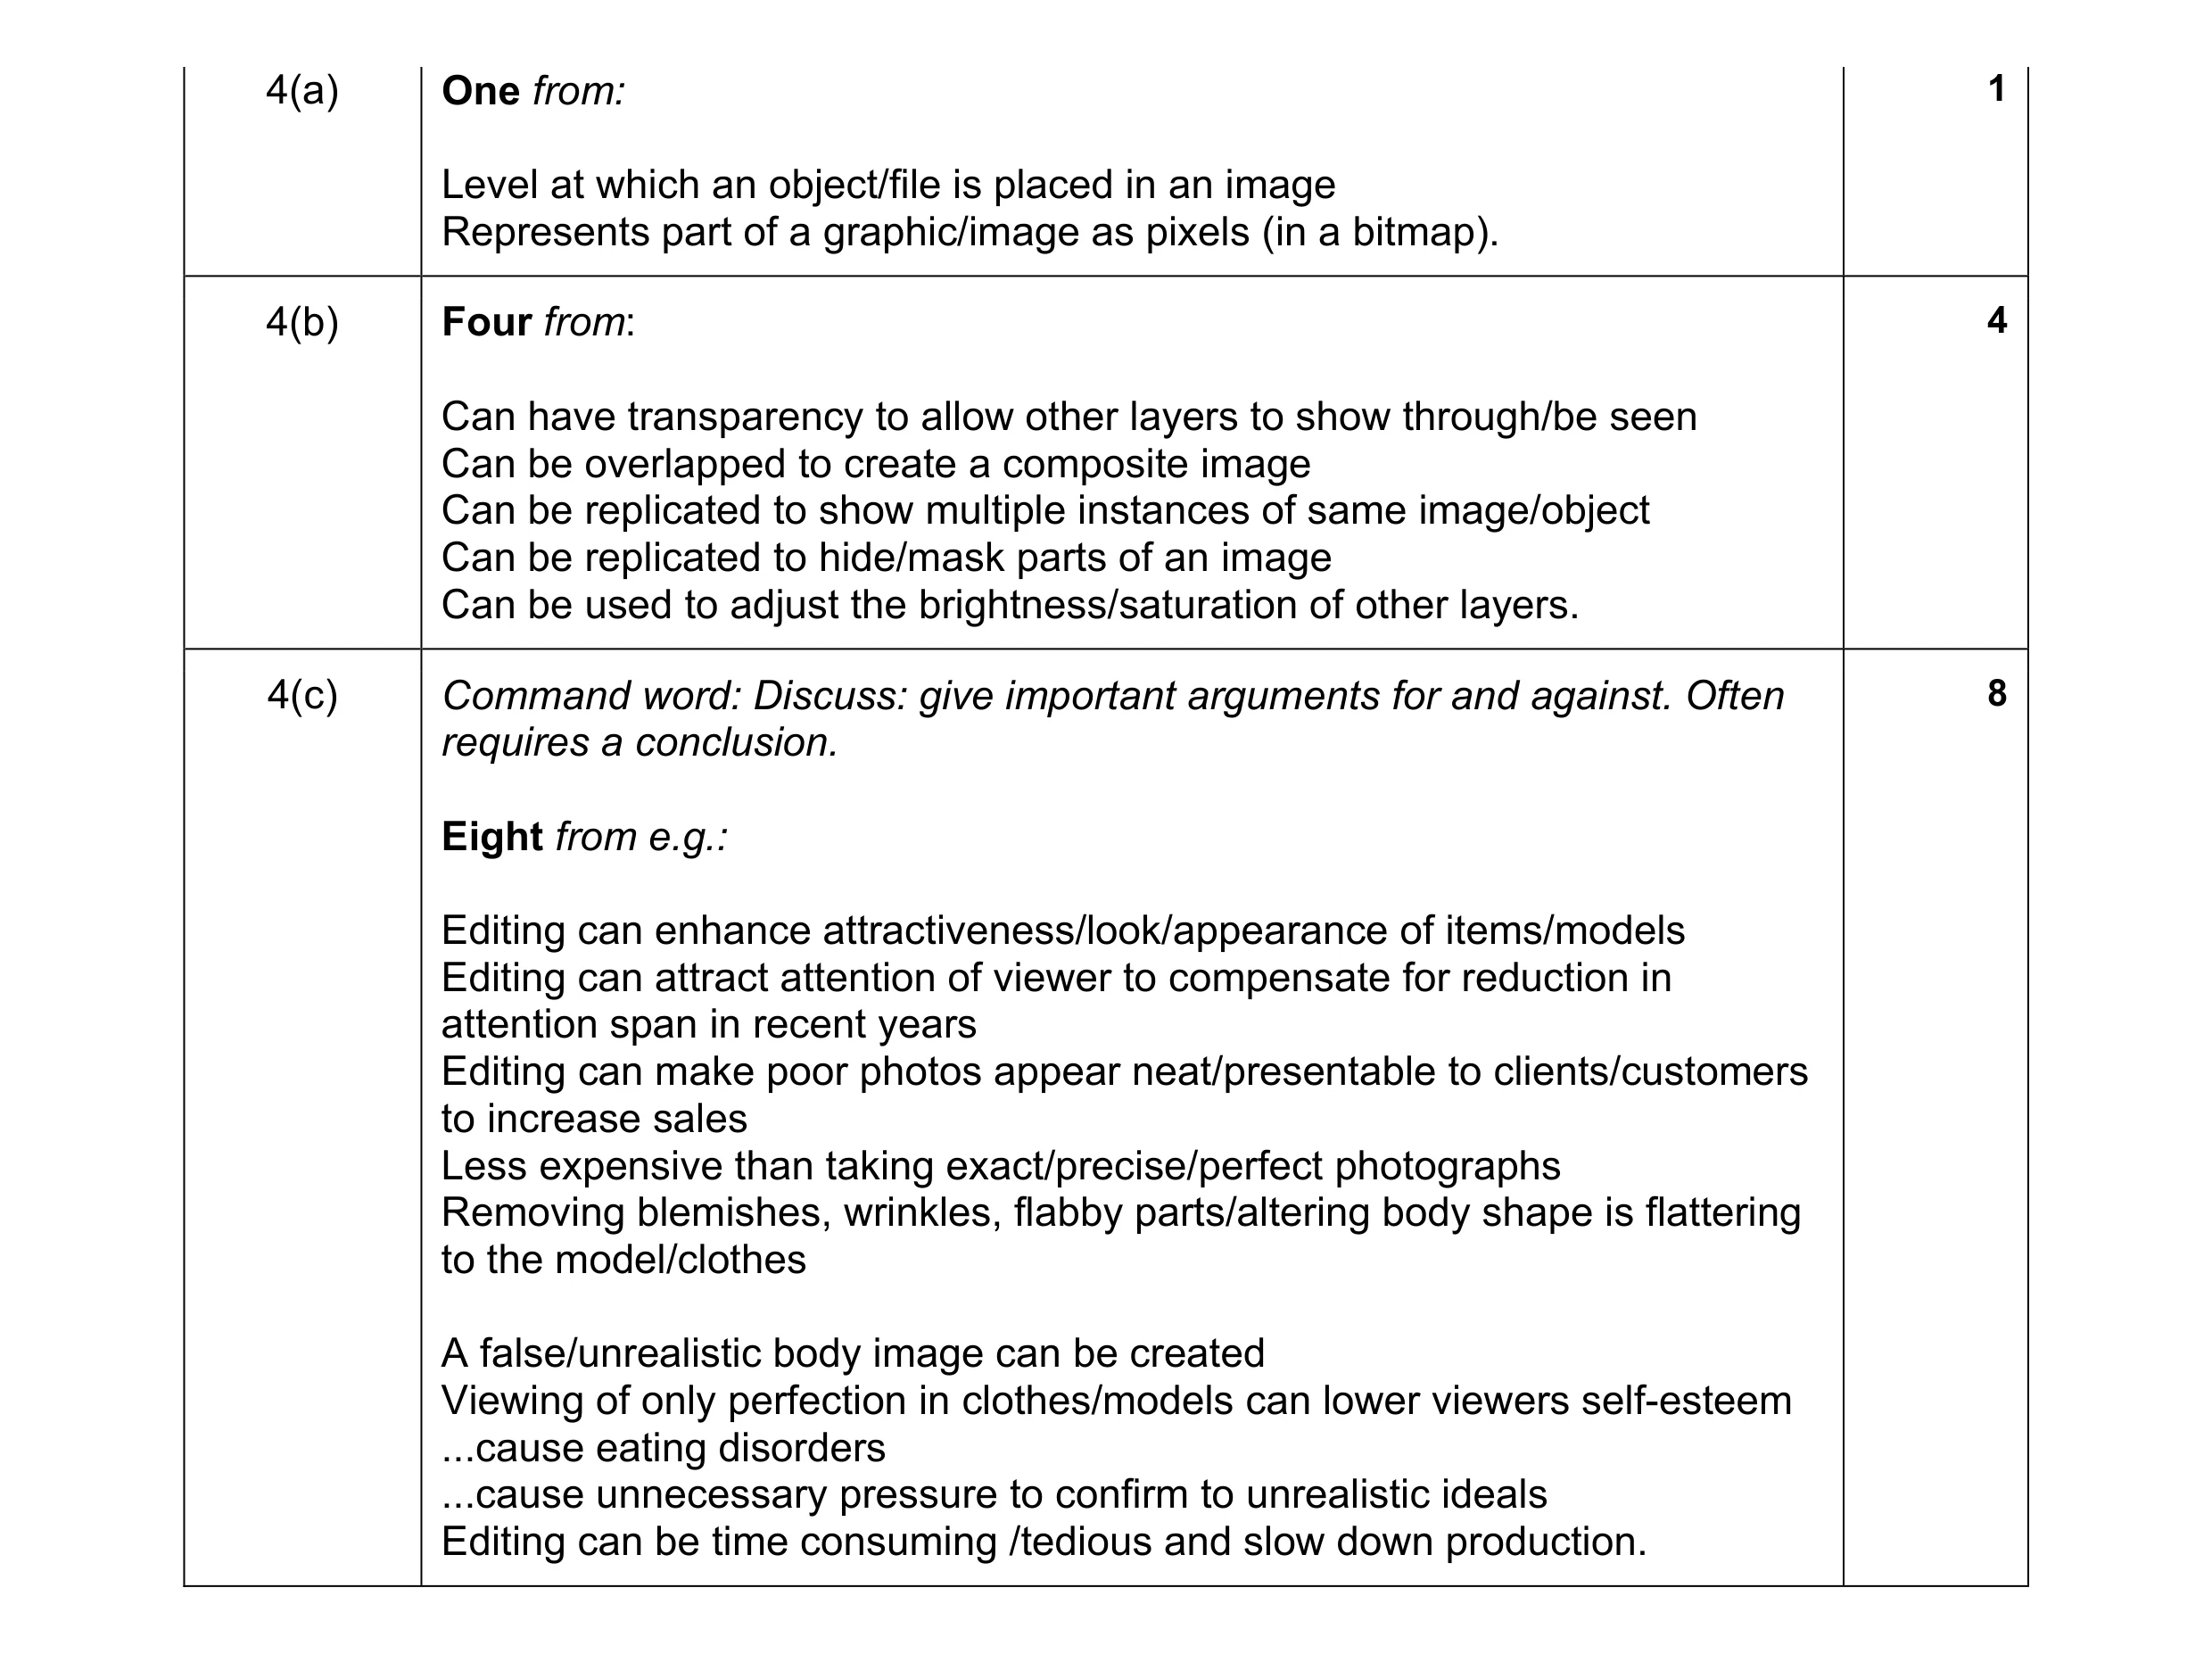 13
13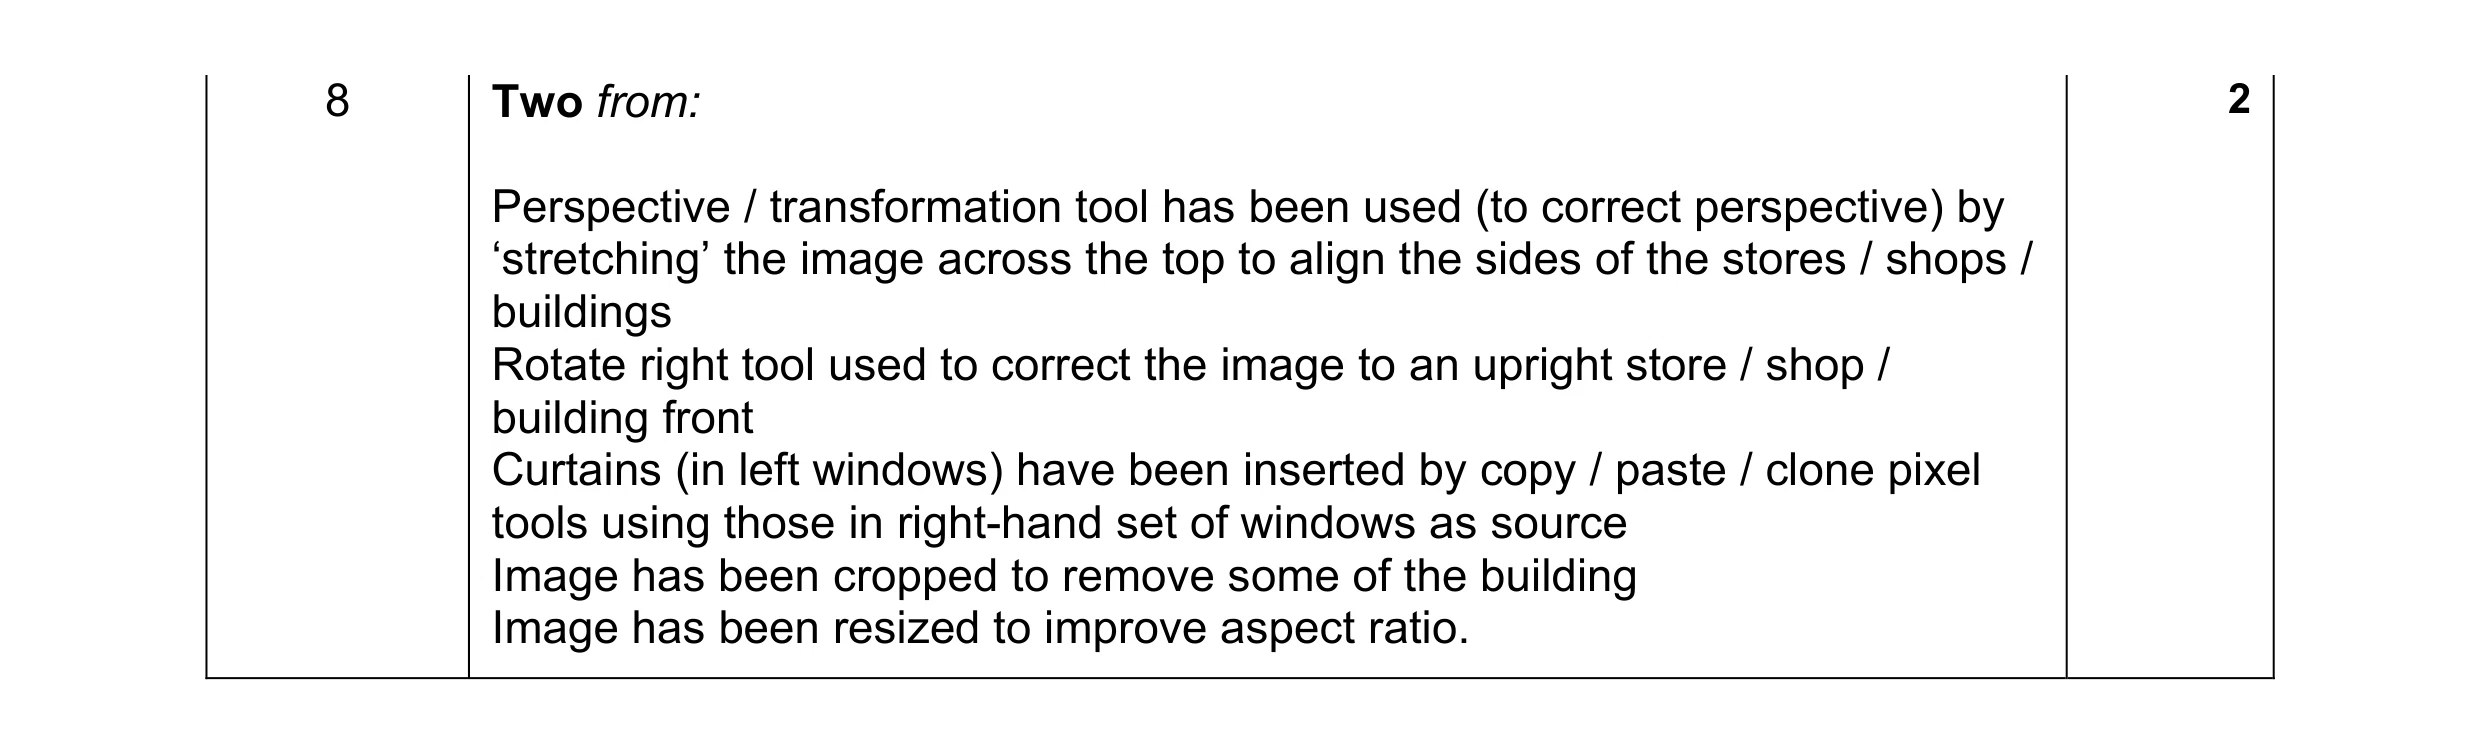 2
2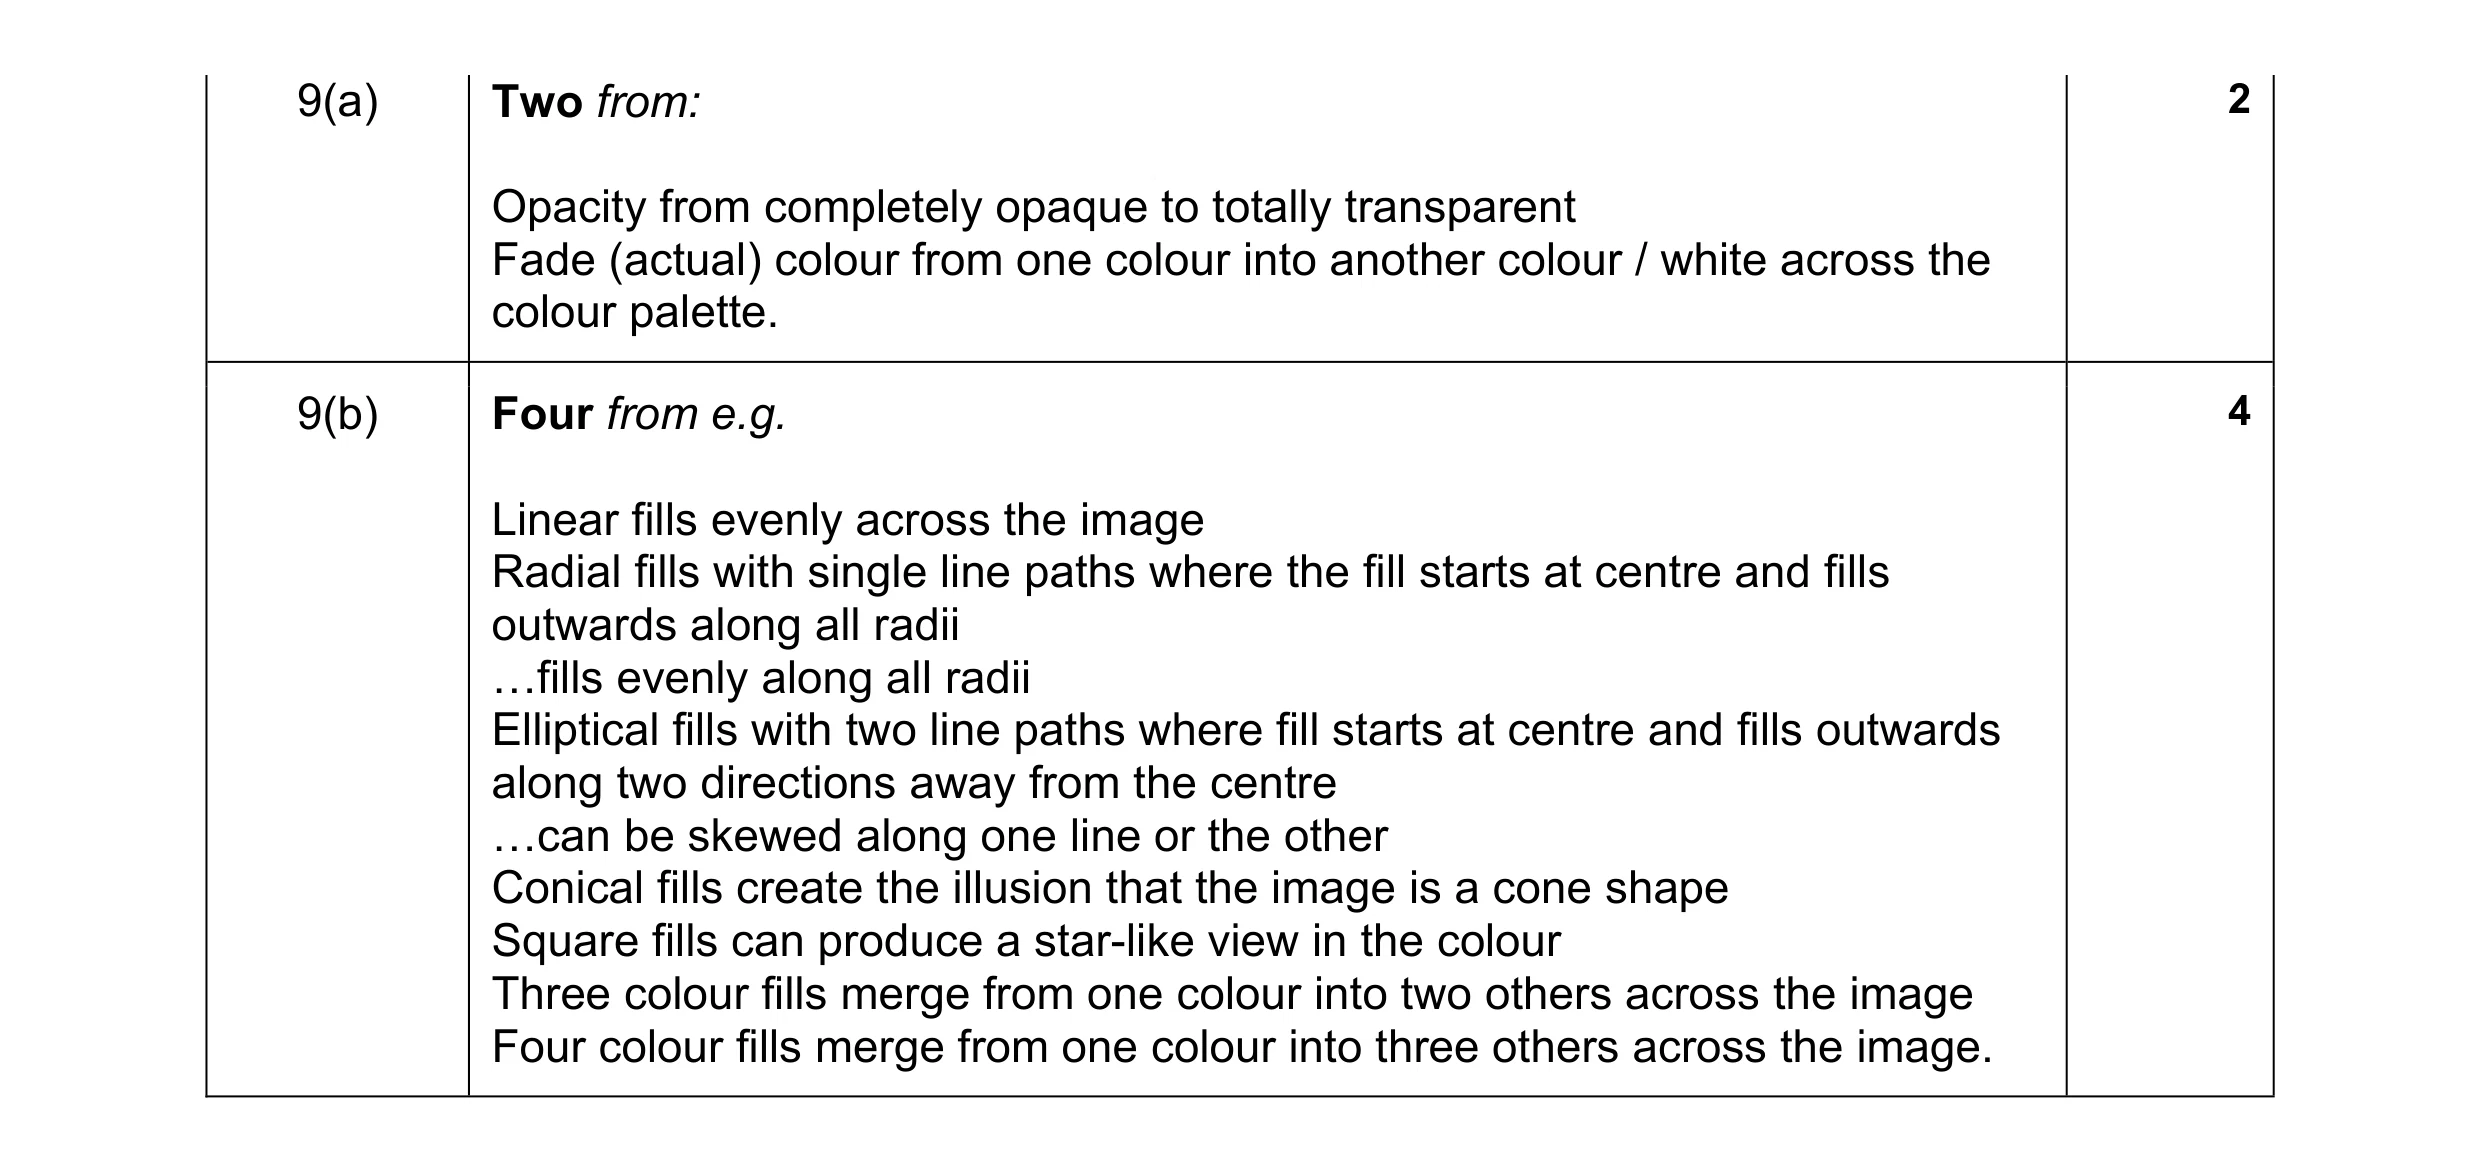 6
6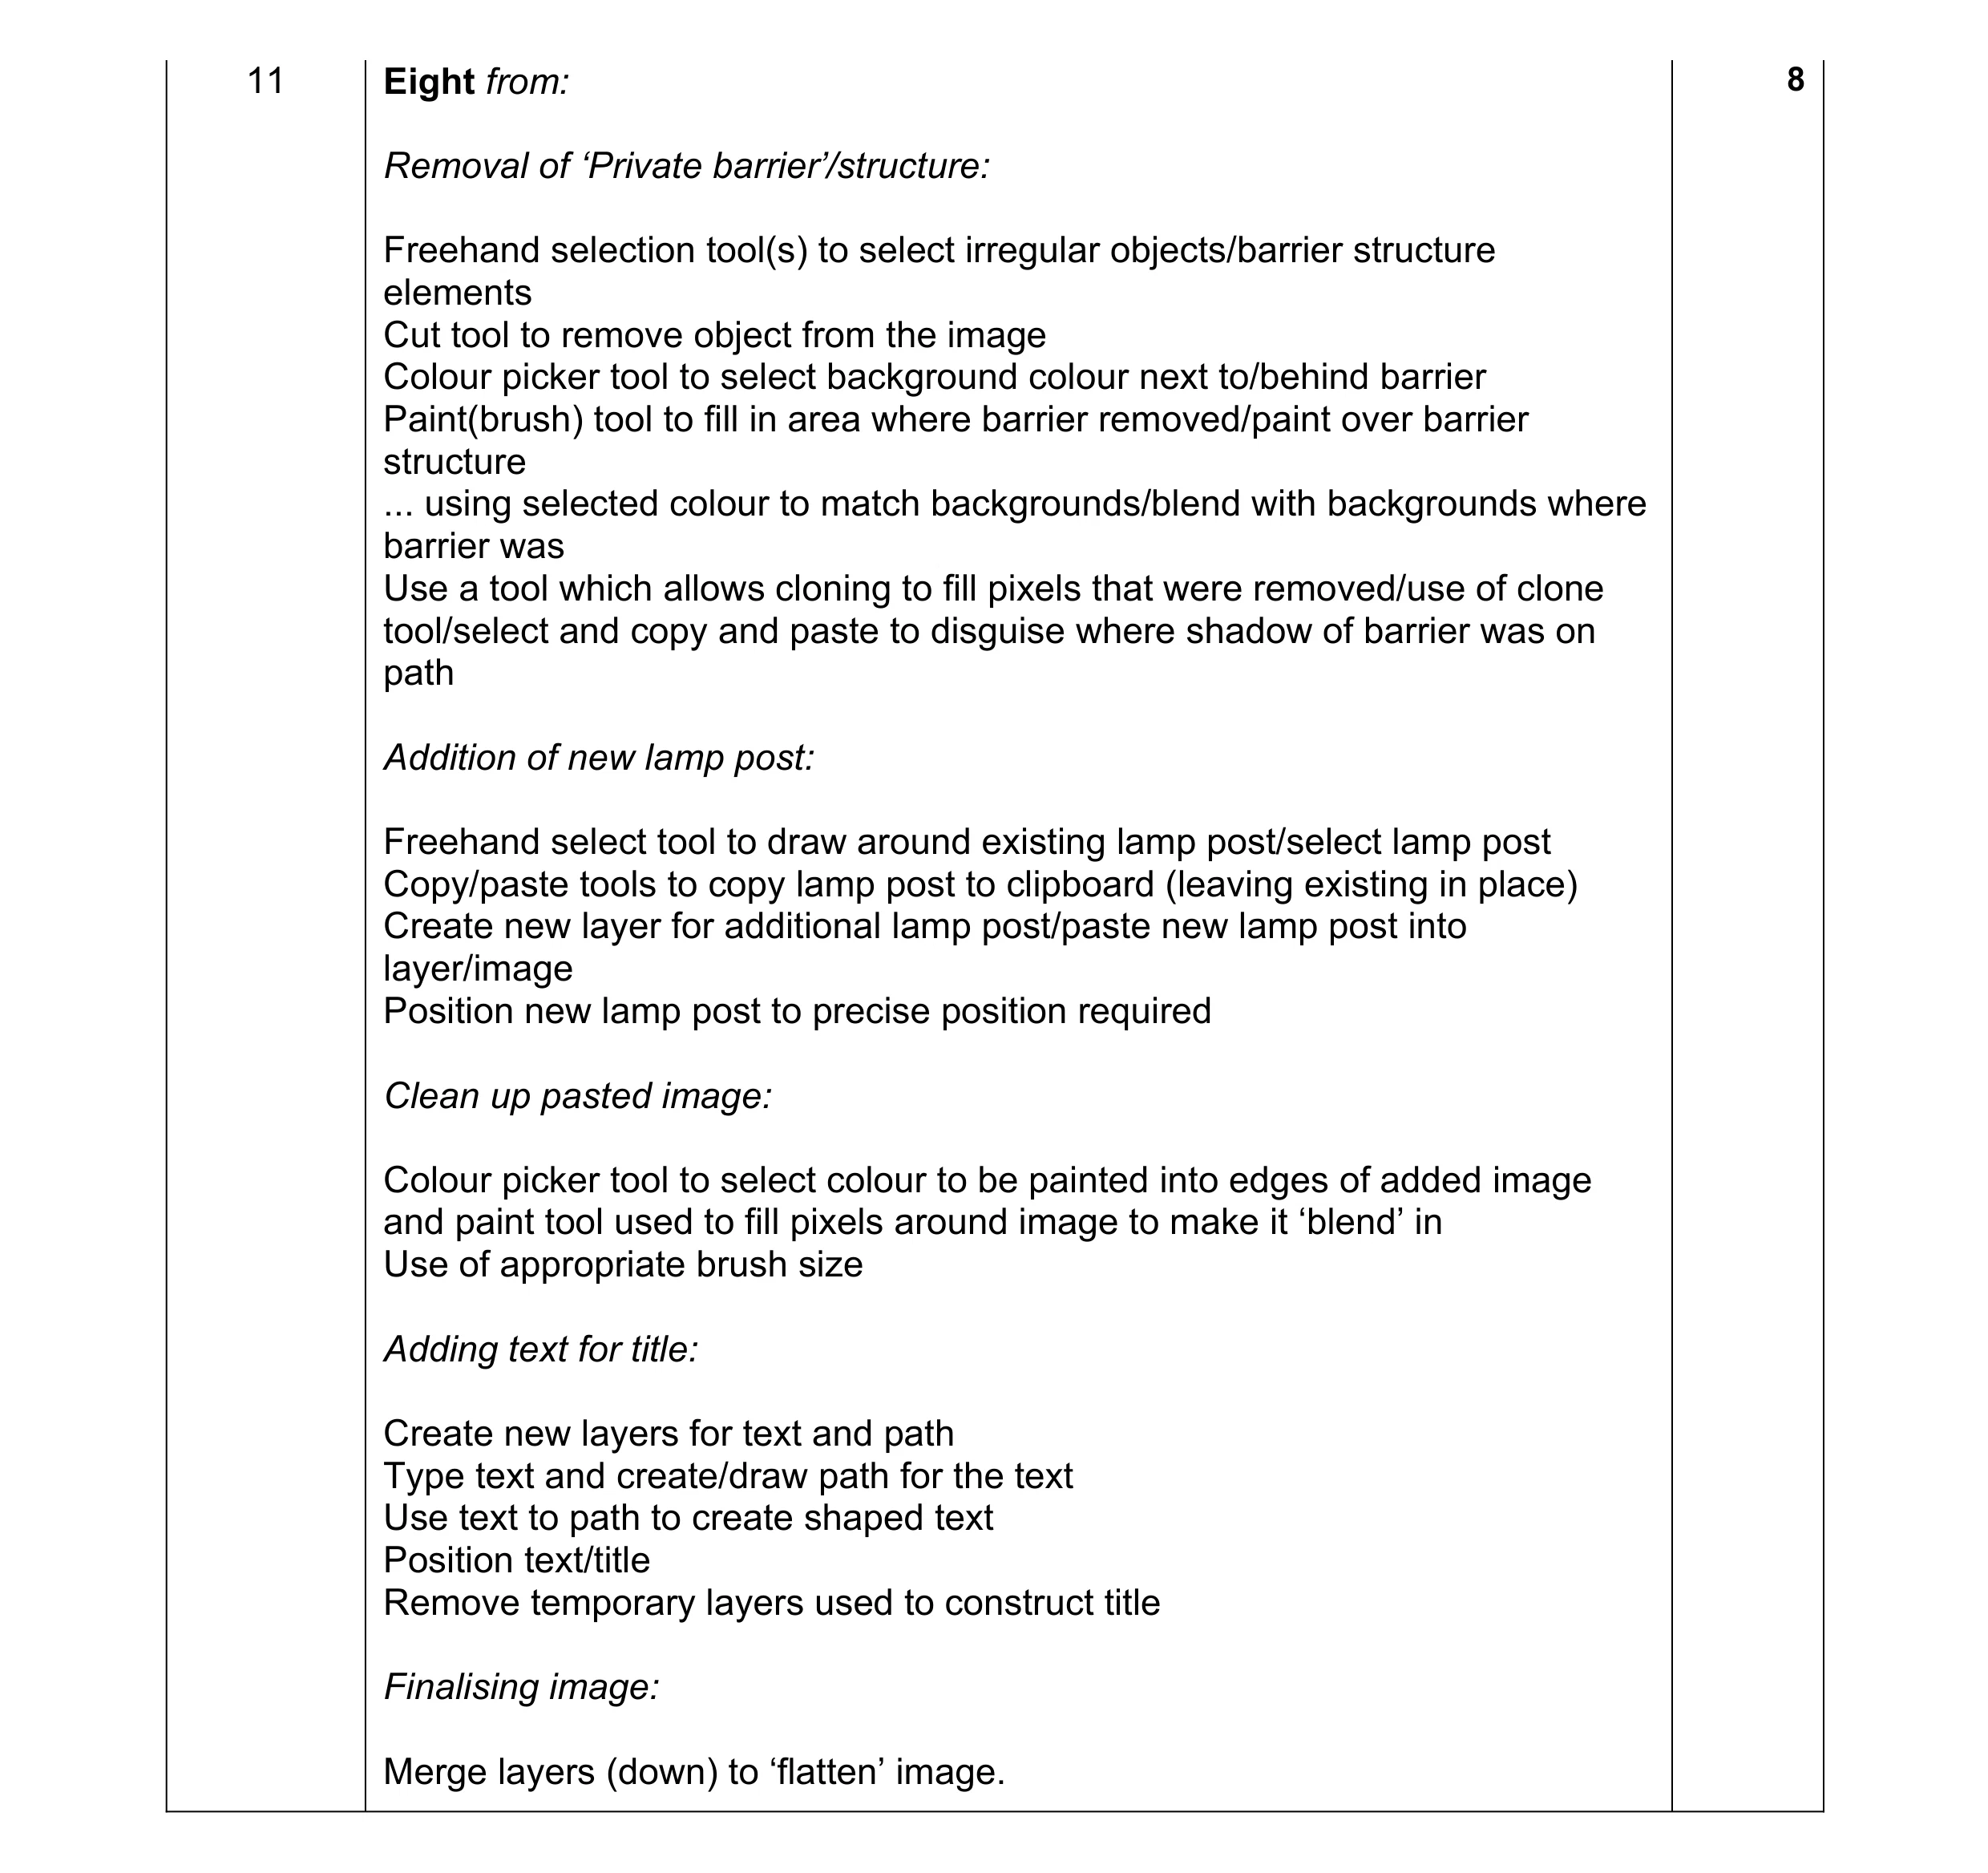 8
8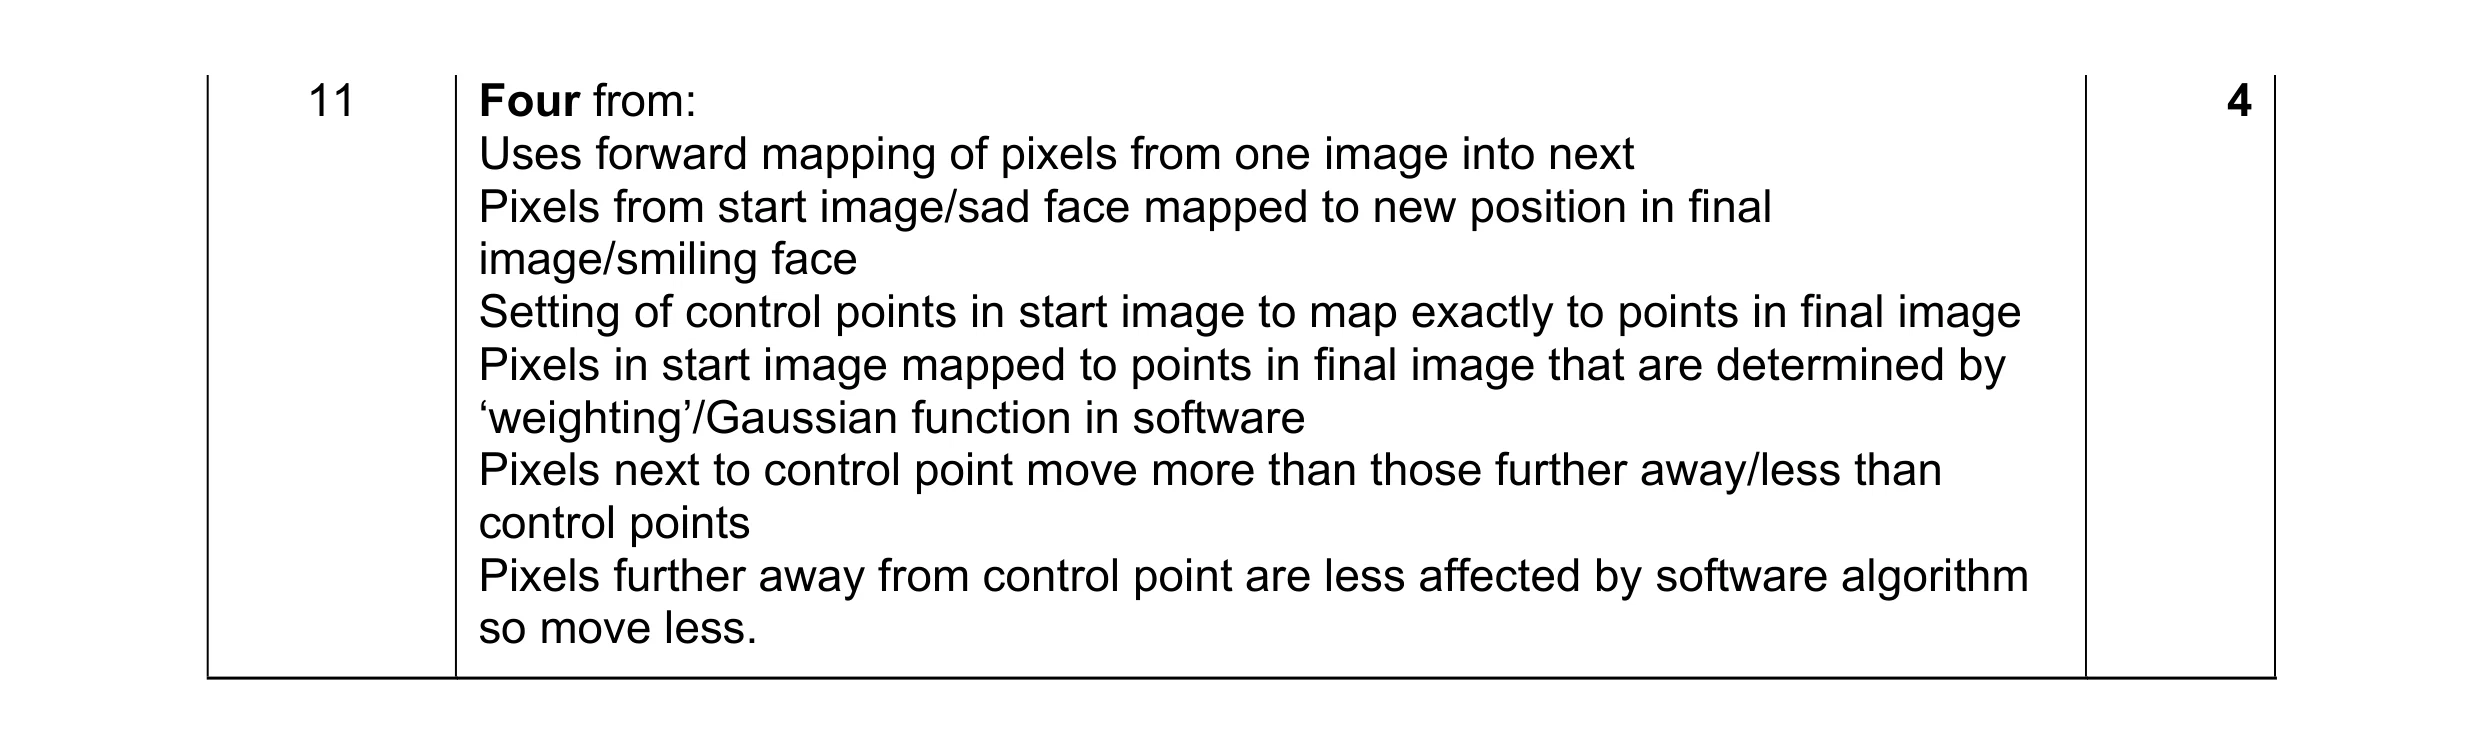 4
4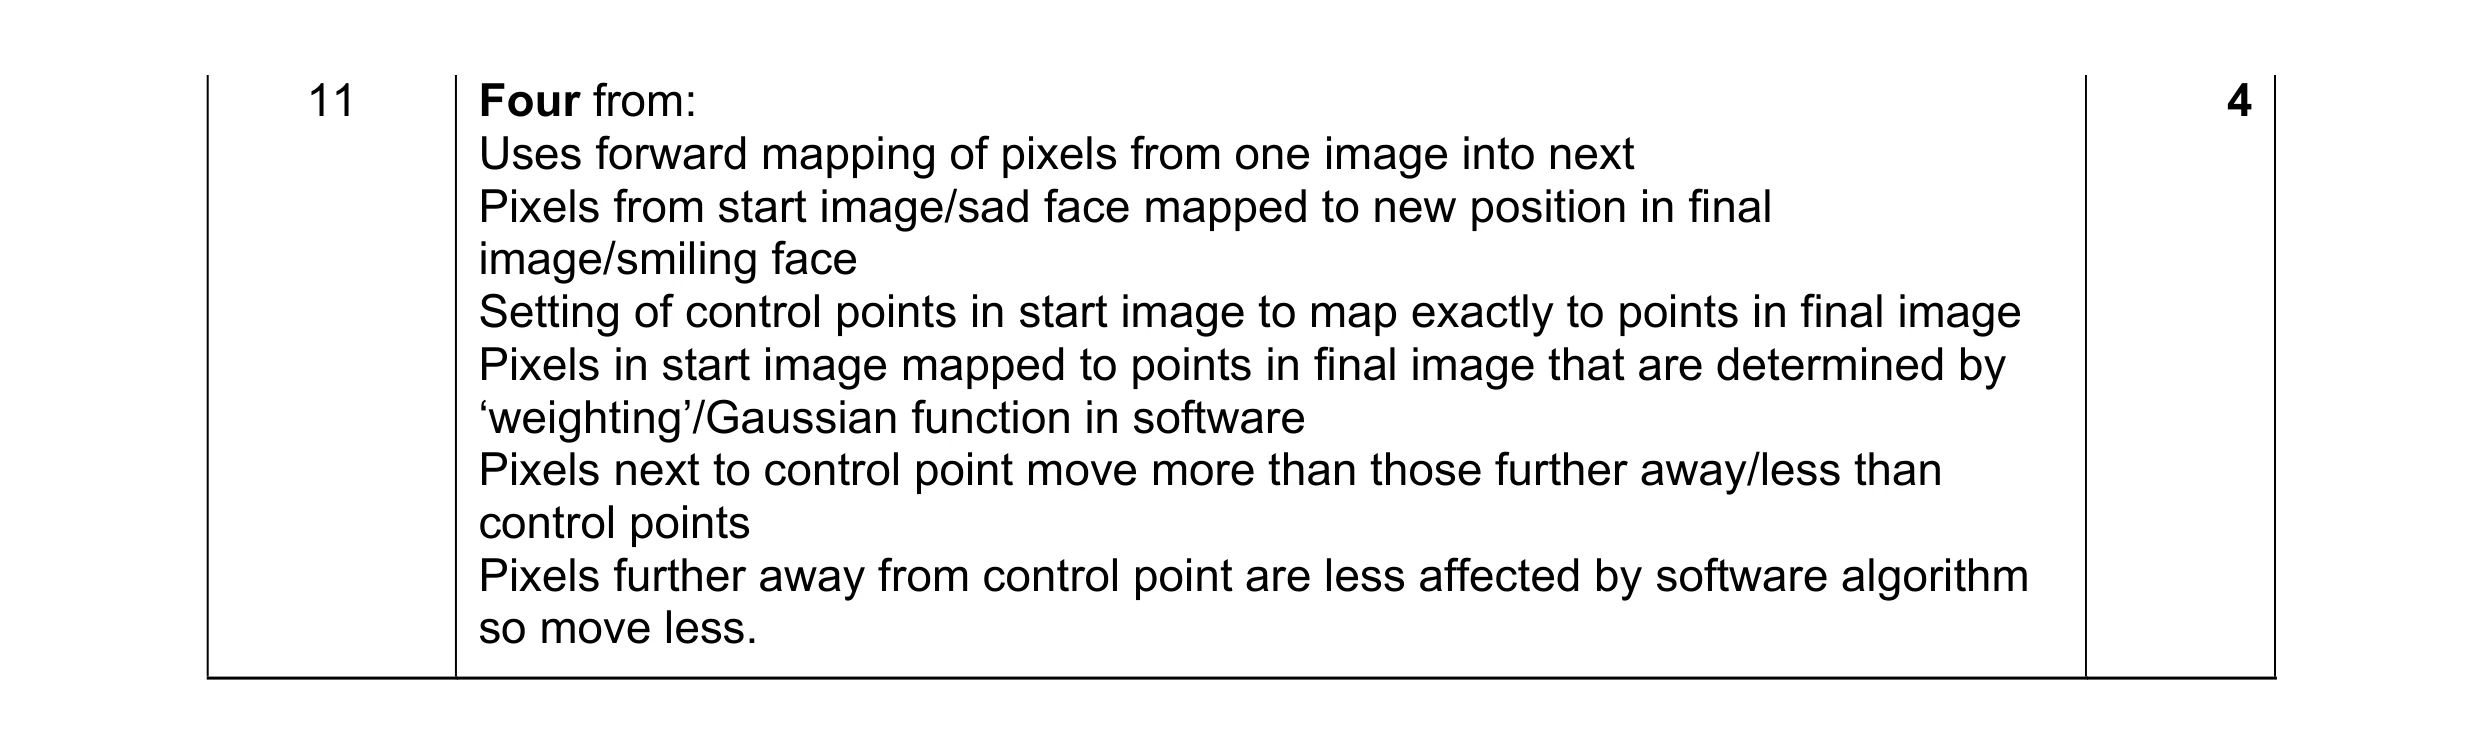 4
4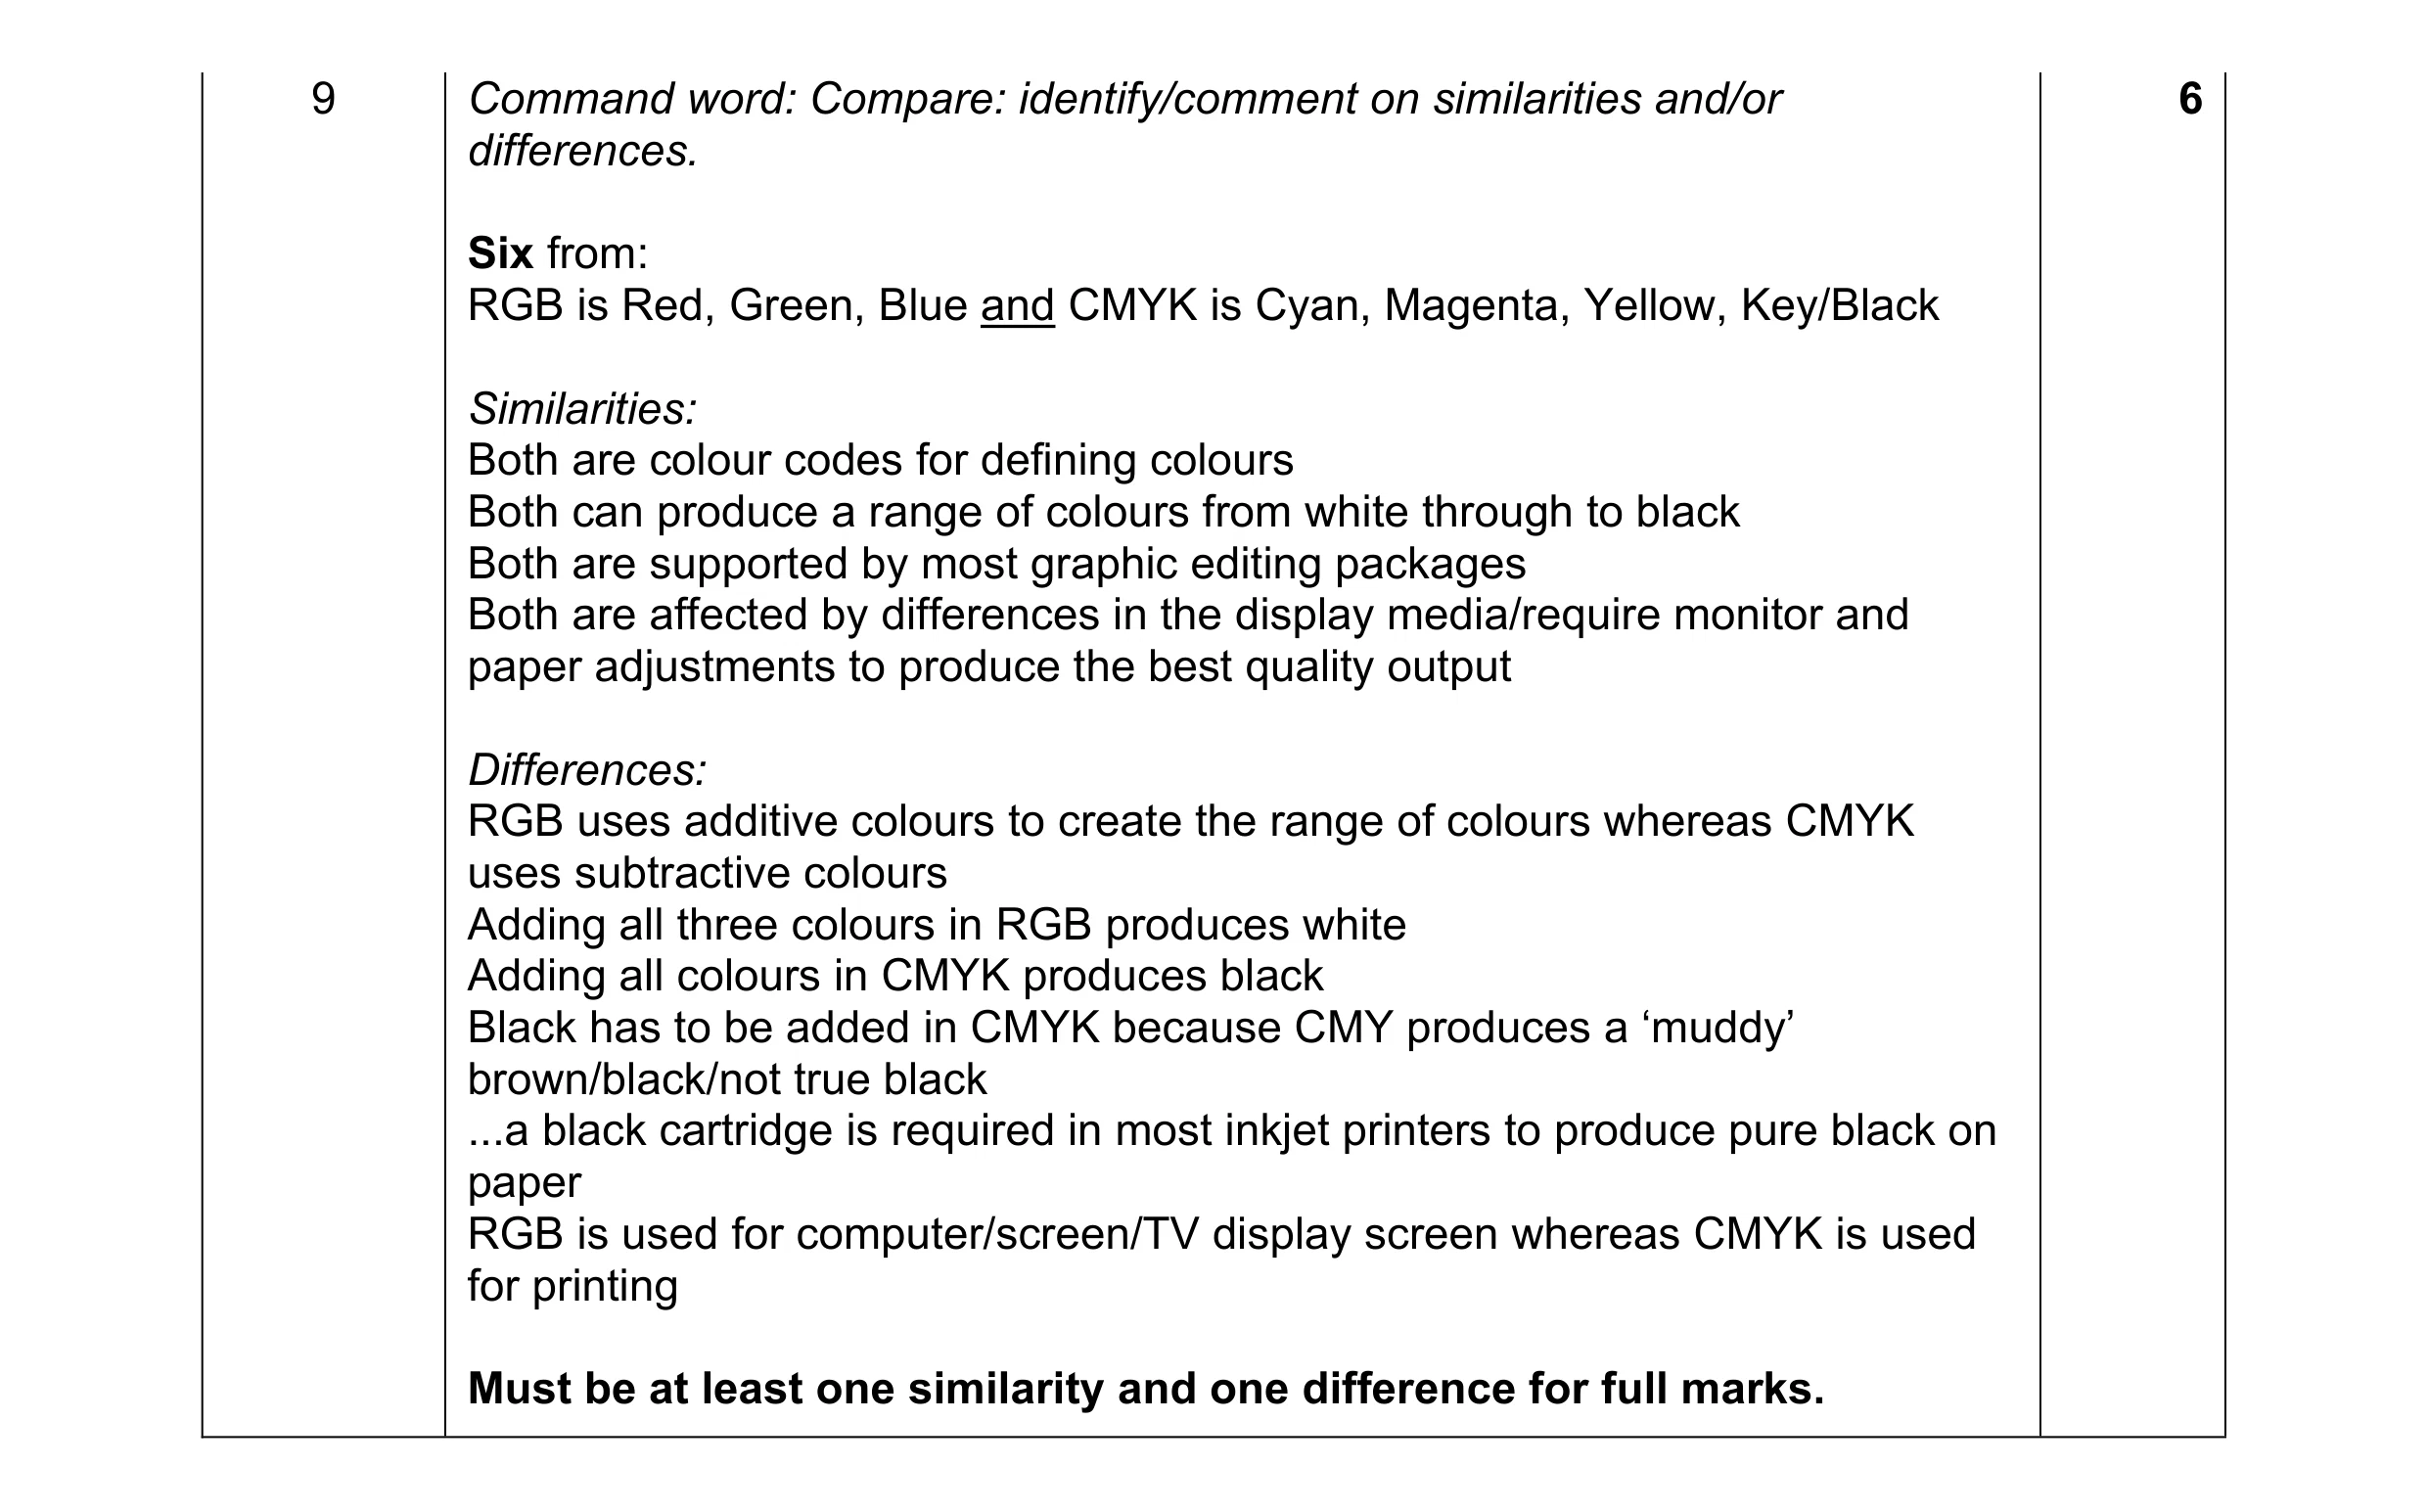 6
6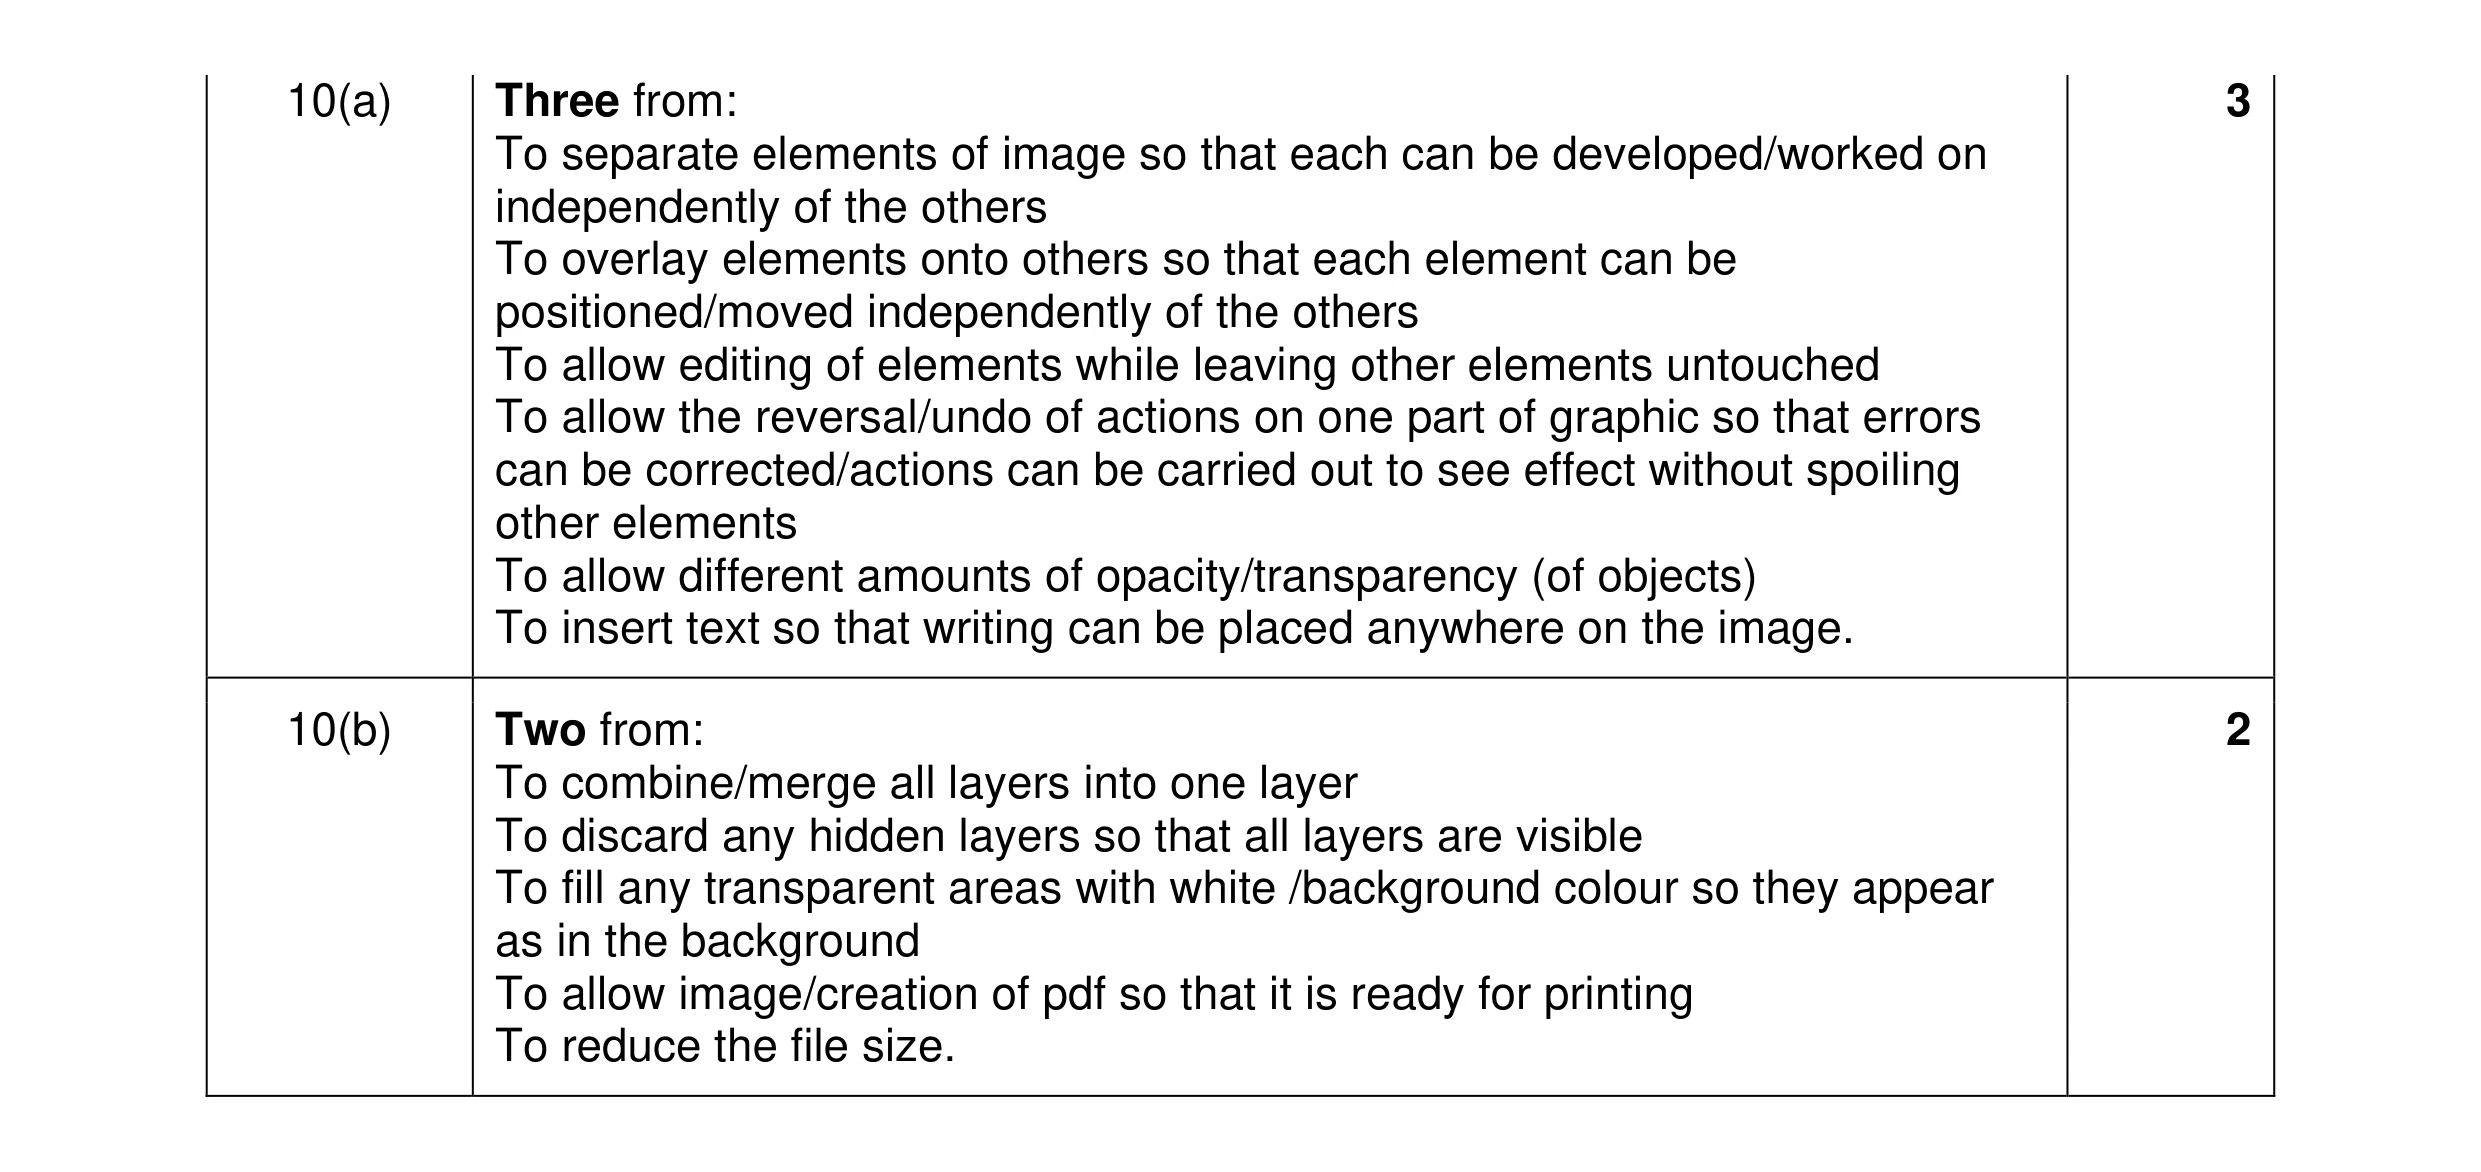 5
5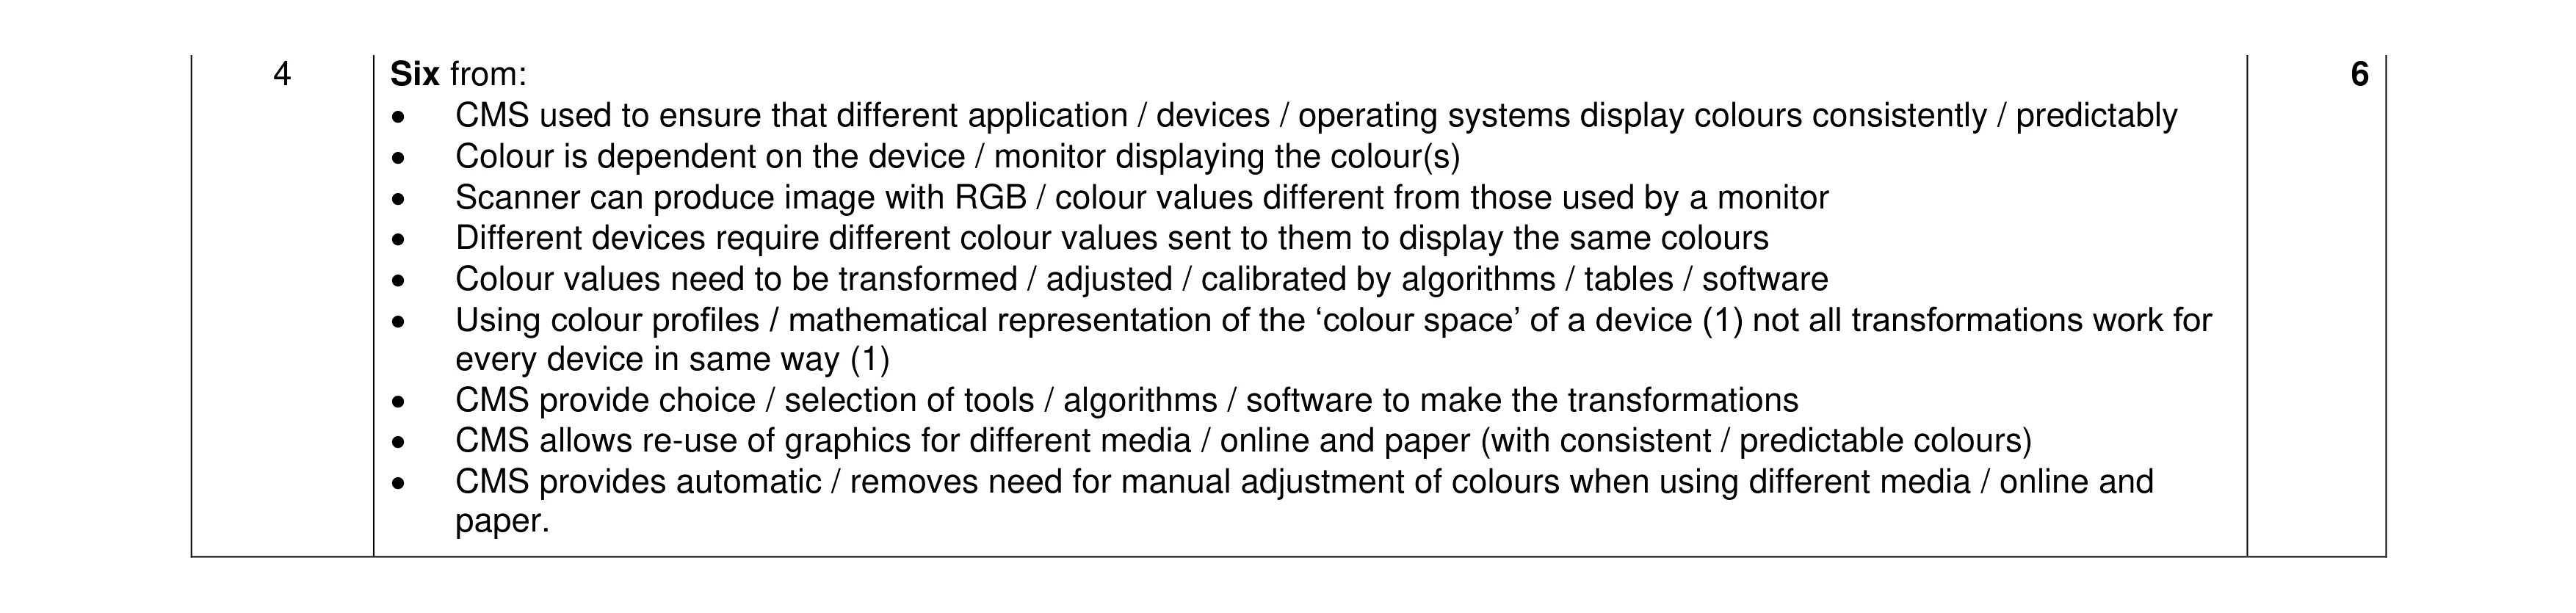 6
6